 Branding
 Digital Marketing
 Web & App Dev
 IT Services
Speed Up WordPress with Caching

Website performance is contingent upon many factors. In a previous blog we discussed ways to improve WordPress performance by reducing image size. Caching is another technique WordPress administrators can use to reduce the time and bandwidth needed to get a web page to a user. In general, web caching improves performance in these areas:
- Web server load: web caches store copies of resources such as images, HTML pages, stylesheets, and scripts. When there is a user request, it comes first to the web cache and if the cache can fulfill the request, it means one less job for the web server.
- Time to fetch a web page: when a user clicks on a web page, WordPress has to pull the page together by making multiple database calls, fetching assets (such as images), and then compiling them into an HTML page that’s served to the browser. Caches store HTML pages and serve them up right away.
With caching turned on, the first time a user requests one of your web pages, a cache file gets created for that page. Once that page is cached, all subsequent users who request that page will get it served up a lot faster. Over time, the cache will contain the most requested files or at least, the most recently requested files.
In high-volume situations, caching can make a big difference; so much so that large enterprises configure caching on a dedicated server. For SMBs, a plugin is usually sufficient. In this blog, we'll walk through setting up WP Super Cache, one of the most popular and reliable free plugins for WordPress caching.
NOTE: Remember, always back up your WordPress files before making changes.
Turn Caching On
Once you’ve installed the WP Super Cache plugin, the first thing to do is to go into its Settings menu and under the Easy tab, turn Caching On. Then press Update Status.
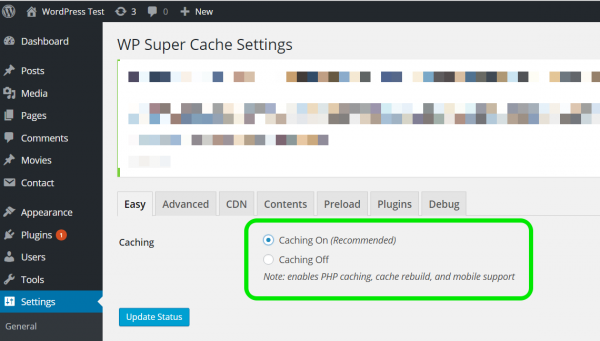
NOTE: each group of settings has its own Update button. Remember to press them as you go along. You may get some warning messages, and you can fix things up later.
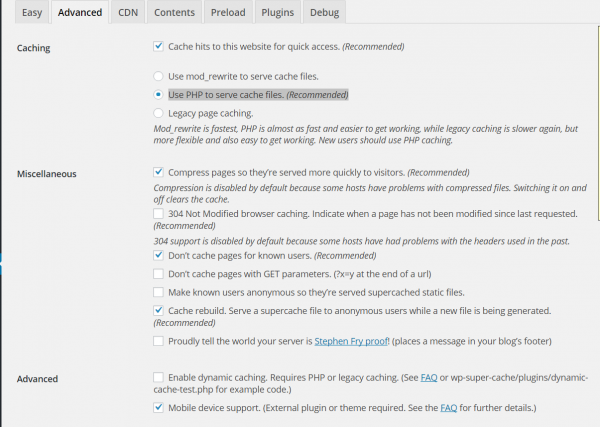
In the Advanced settings tab, the following settings should be turned on:
Caching, Miscellaneous and Advanced
- Cache hits for quick access
- Use PHP to serve cache files: mod_rewrite is faster, but don’t select this option unless you have mod_rewrite installed.
- Compress pages so they’re served more quickly to visitors: the note for this setting warns that some hosting providers have problems with compressed files. If this is the case, you’ll know right away: the webserver won’t serve up pages at all. Or, ask your hosting provider.
- Don’t cache pages for known users: ‘known users’ means logged in users. These users will see personalized pages ( ‘Welcome Jane!’, members-only pages, custom content based on previous choices, etc.) which require dynamic pages.
- Cache rebuild.
- Mobile device support: allows WP Super Cache to work with a separate plugin or theme. When the plugin detects a mobile device, it passes the request on to another plugin to render a page for mobile device screens. WP Super Cache has tested Jetpack's Mobile Theme Module, WPTouch, WordPress Mobile Edition, WordPress Mobile Pack.
- Extra homepage checks: home pages these days tend to be dynamic and show random blogs posts, news updates, etc. This setting keeps the HTML page for the home page fresh.
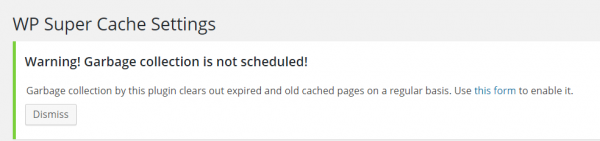
Press Update Status to save your settings – and you’ll get this warning message.
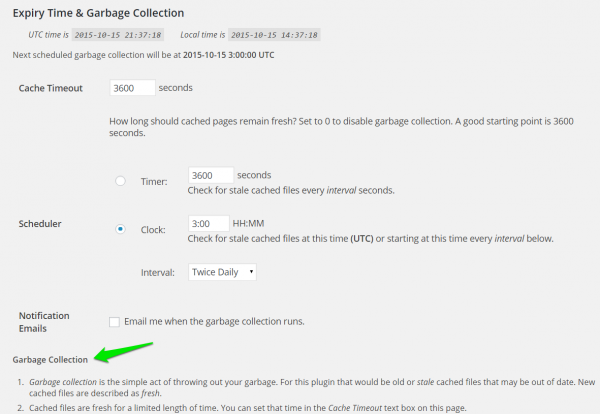
Expiry Time & Garbage Collection
This is pretty straightforward. The Garbage Collection section contains notes describing what the settings do, but the short version is that cached versions of static pages expire, or get out of synch when the original pages change. Content updates, blog comments, and other factors make it necessary to refresh cached pages. The more often your content changes, the more often you need to refresh. The more often you refresh, the more stale cached files you have hanging around because those cached files don’t go away by themselves. Hence, garbage collection.
- Cache Timeout: as a starting point, try 3600 seconds (30 minutes). This refreshes cached files every 30 minutes.
- Scheduler: how often do you want garbage collection to run? There’s no magic number or formula. If you don’t have a lot of pages, you can do this once a day. If you have a big website and accumulate a lot of stale pages every half-hour, you may want to do this once an hour.
- Timer: gives you very granular control for frequent garbage collection
- Clock + Interval: start garbage collection at the same time every day or, if you use the Interval setting, it will run first at the specified time then hourly, once, or twice daily.
Press Change Expiration to save settings -- and the warning message will also go away.
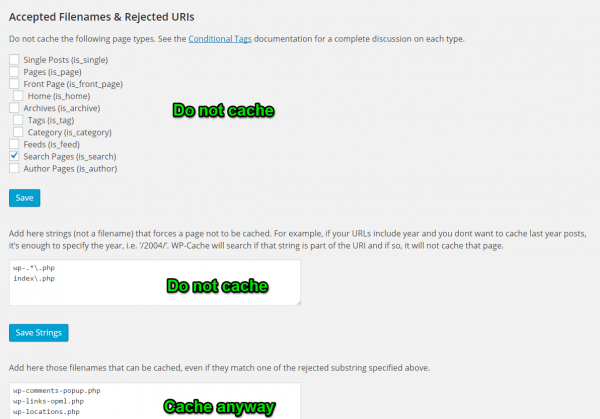
Accepted Filenames & Rejected URIs
If your pages are very dynamic or if you want to be sure the content users see is always the latest, you may want to avoid caching them altogether. Pages with pricing or an active news page, for example. You can use the tick boxes to designate different types of pages or provide a string to identify pages you don’t want to cache. In the third section, you can add filenames which match the types and strings which you do want to cache.
The defaults are fine. If you think there’s a chance that your visitors will often use the same search criteria, you may want to turn on Search pages to avoid an old search result from being served up.
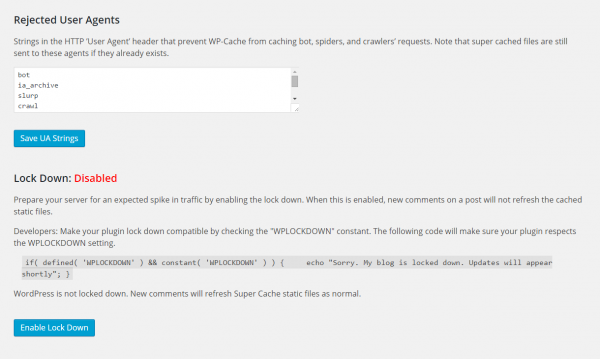
Rejected User Agents and Lock Down
A cached file is created for every page requested by a user. In theory, your cache will contain the most popular or at least the most-recently requested pages. Googlebot, Bingbot and other search engine bots are also users – except that unlike a human user, they crawl your entire site looking for recently changed pages to index.
The Rejected User Agents setting is up to you. If you can think of any reason why you wouldn’t want pages that have been requested by certain bots to be cached, then delete relevant user agents from the list. Frankly, there’s no reason why you shouldn’t cache copies of pages requested by a bot because you should send the same page to both users and search engines. Press Save UA Strings if you make changes to this section.
Lock Down is now obsolete. It was meant to prevent caching in situations where your blog sees a spike in traffic from comments. If you have Cache rebuild turned on, it does a better job of handling large traffic volumes and also refreshes blog post comments in a timely manner. Do NOT press Enable Lock Down.
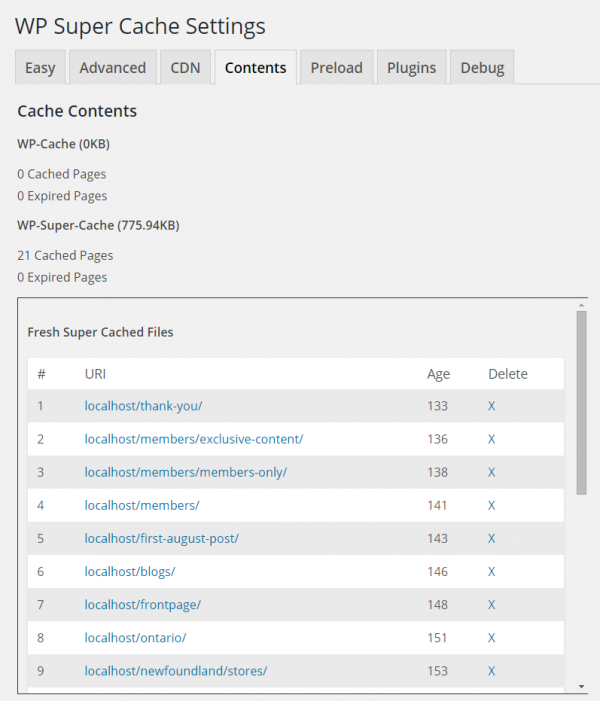
Have you cached any pages?
By default, now that you’ve turned on caching, the next time a user lands on a page, it will be cached. Therefore, when you first look at the Content tab, there are no cached pages. By default, your web pages will get cached on an on-demand basis as users land on them. If you have a very busy site, you’ll build up a set of cached pages fairly quickly. List all cached files will show you which files have been cached.
Page load time has become an important consideration for Google SEO. Caching, however, is one of just many factors that can slow down your website’s performance. If your website is suffering from poor performance, it could be due to content, design, network bottlenecks or your computing environment. Talk to us about IT audit services to identify issues slowing down your website response time.

