 Branding
 Digital Marketing
 IT Services
 Web & App Dev
Two Simple Options for Speeding Up WordPress Images

Big image files affect download speed. When a client brings up the topic of WordPress performance, one of the things we always suggest is that they audit their website for image size. Every time a visitor clicks to a page of your website, WordPress has to fetch the resources needed to render the page. Caching improves performance by creating static HTML pages for your WordPress site, but images on those static pages do not get compressed. Therefore, whatever you can do ahead of time to optimize those images will be worth it.
- A single image on one webpage may not seem like an issue, but if your website is serving up thousands of pages and images to thousands of users, the resource impact adds up.
- It’s good practice to reduce bandwidth use whenever possible, especially now that mobile users outnumber desktop users – they’re accessing your website via slower cellular networks.
- Google uses site speed as a factor in ranking for SEO
Here are a couple of simple ways to optimize image use in WordPress.
1.Use WordPress Thumbnails
Quite often a website doesn’t need the full size, full resolution image to look good. Instead of using original full size images, try using smaller versions.
WordPress provides resized image files called ‘thumbnails’. These do not require any plugins or special code. Whenever you upload an image to your Media Library, WordPress stores the original image file and also automatically generates resized versions of the image according to your Media Settings. Furthermore, whenever WordPress displays one of these images on a page, it scales down further to approximately 90% of the display setting.
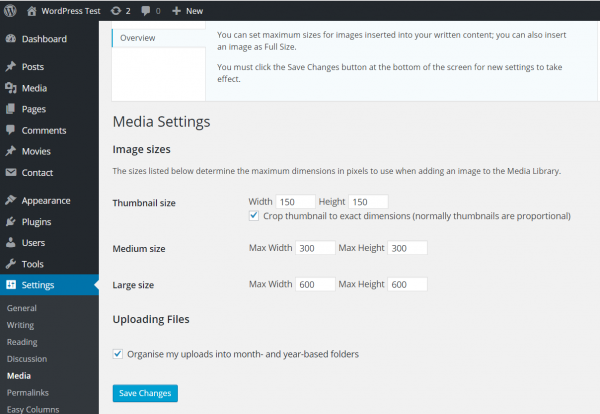
To see the image sizes WordPress generates for you automatically, go to Settings > Media. In the example below, WordPress creates three thumbnail images with the specified maximum dimension settings of 150 x 150 pixels, 300 x 300 pixels, and 600 x 600 pixels. You can change these to suit your site. Note that these are maximum dimensions; therefore if an image is rectangular and not square, either its height or width will conform to one of these dimensions, and images will be resized to the correct aspect ratio.
To upload an image to WordPress, go to the Media Library and select Add New. Then select an image to upload.
Next, insert the image in a page or post by using the Add Media button. This brings up the Insert Media menu. Select the image you want and take a look at its Attachment Details. You’ll see that the original image of ‘Desktop Cat’ is 1200 x 1650 pixels and approximately 2 MB in size. Under Attachment Display Settings, you can see that WordPress has stored the image in its full, original size and has also generated three versions: Large, Medium, and Thumbnail.
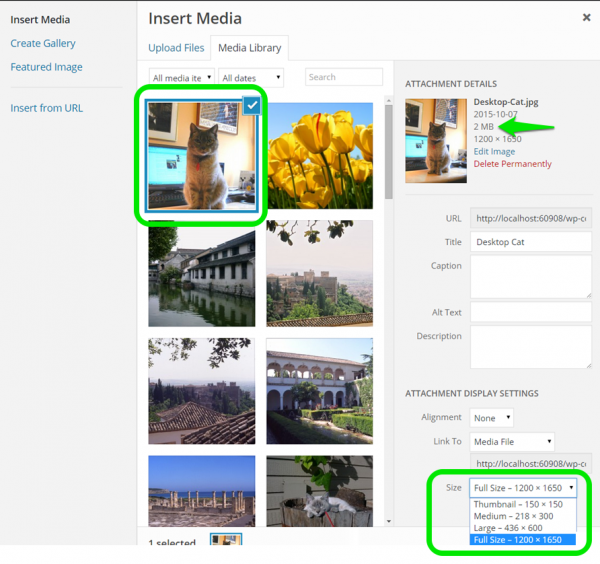
In this example, I’ve selected the Large version (436 x 600). If you use a browser such as Firefox to view the resulting web page (left), you can right-click to select View Image Info (right). You can see that WordPress has done that 90% thing and scaled the display image to 414 x 569 pixels. The image quality is more than adequate for this web page and the image file size is approximately 77K, less than half the original 2 MB file size.
About Custom Sizes
Let’s say you need the image to be a specific size: a height of 200 pixels. However, neither WordPress nor your theme generated this thumbnail size. One way to do deal with this is to use the Custom Size display setting.
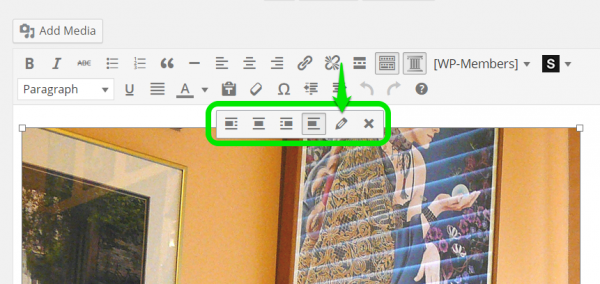
To do this, click on the inserted image to bring up the image toolbar, then click on Edit (pencil icon).
Then from the Image Details menu, select Custom Size from the Display Settings and enter 200 in the Height field.
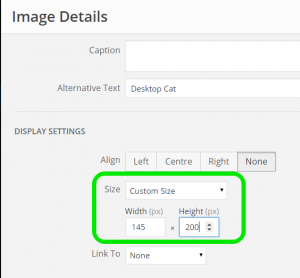
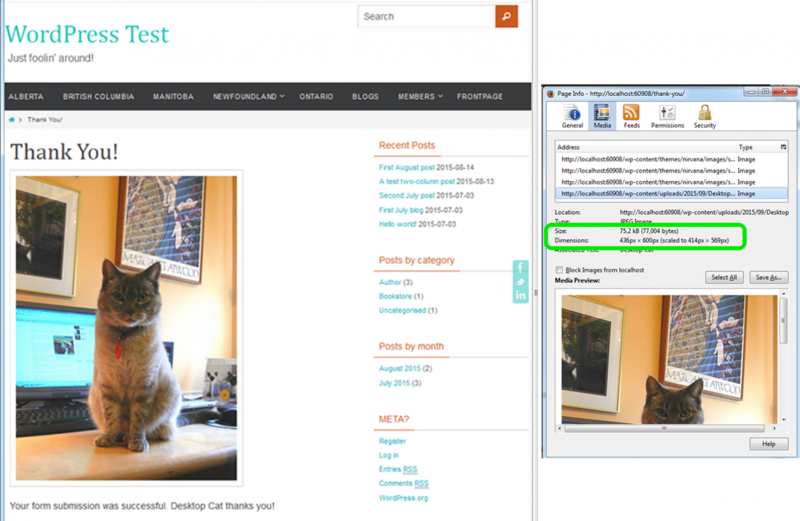
This inserts a display image with a height of 200 pixels (below, left).
However, when we use the browser’s View Image Info function (below, right), note that while the display image is now scaled to 123 x 169 pixels, the file size remains 77 Kb.
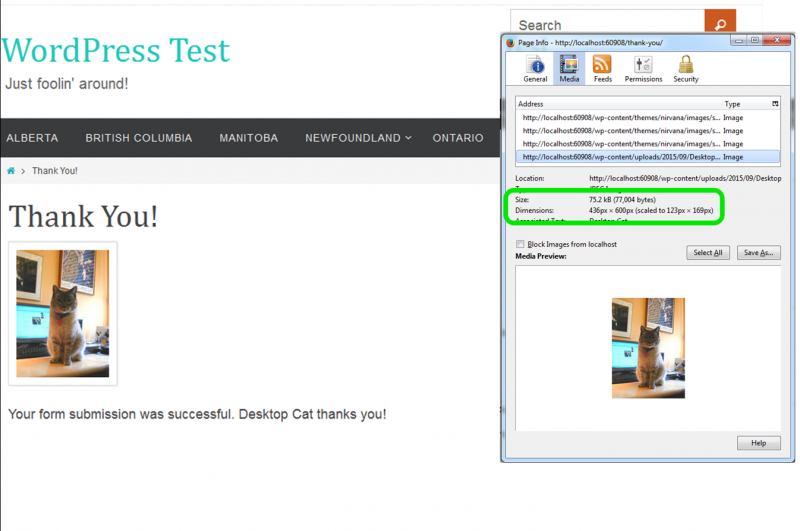
Display setting size does not always reflect file size. Display setting refers to the size of the image on the screen, while file size is the actual … well, file size, in bytes. When WordPress first uploaded the image, it generated files for those thumbnails with proportionately smaller file sizes; when you elected to use a thumbnail, you helped improve performance.
The Custom Size setting only manipulates display image size – you don’t actually get a smaller file. This also impacts users because instead of just reading an HTML page, their browsers need to do some work and scale the image to the required display size.
Another drawback to using Custom Size on-the-fly is that it puts the burden on content editors to resize. For example, they may want all in-line images for blog posts to be the same size. If there isn’t a thumbnail version available, they’ll have to use Custom Size and remember the dimensions to use each time. If they forget or don’t bother, the look of your site suffers. You may also end up using less-than-optimal images.
To streamline this process, use the Simple Image Sizes plugin.
2. Use the Simple Image Sizes plugin
Simple Image Sizes is a very popular plugin and for good reason. Once you’ve installed the plugin and defined the dimensions of all the thumbnails you want, WordPress generates those thumbnails for every image you upload. Not only that, but it allows you to regenerate thumbnails for images already in your Media Library.
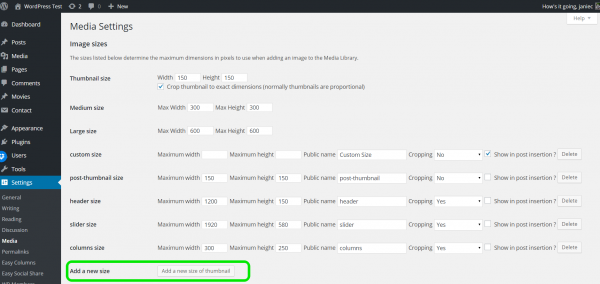
After you’ve installed the plugin, you’ll notice that the Media Settings menu now contains a much longer list of image sizes. This is because Simple Image Sizes has picked up all registered image sizes, including the ones specified by your theme. Therefore it’s best to leave those existing settings alone and use Add a new size of thumbnail.
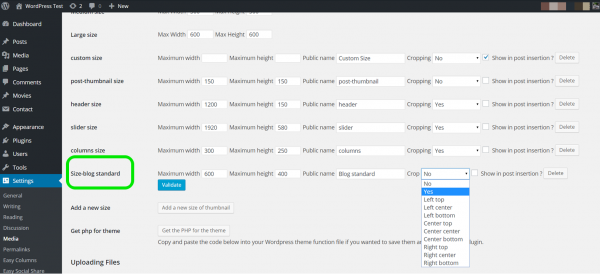
Give the new thumbnail a unique and meaningful name. For example, my new thumbnail is called ‘blog standard’
- The dimensions I want are 600 x 400 pixels
- Public name is the name that displays on the drop-down list of thumbnails
- Select ‘Show in post insertion’ so that the new thumbnail actually displays on the list.
Cropping:
- ‘No’ means WordPress will scale the image for best aspect ratio based on either a maximum width of 600 or a maximum height of 400.
- ‘Yes’ means WordPress will crop the image to exactly 600 x 400 using center positions.
- Or, there are a number of options for which area of the image will be used in the cropped version: left top, left center, left bottom, etc.
Click Validate to complete
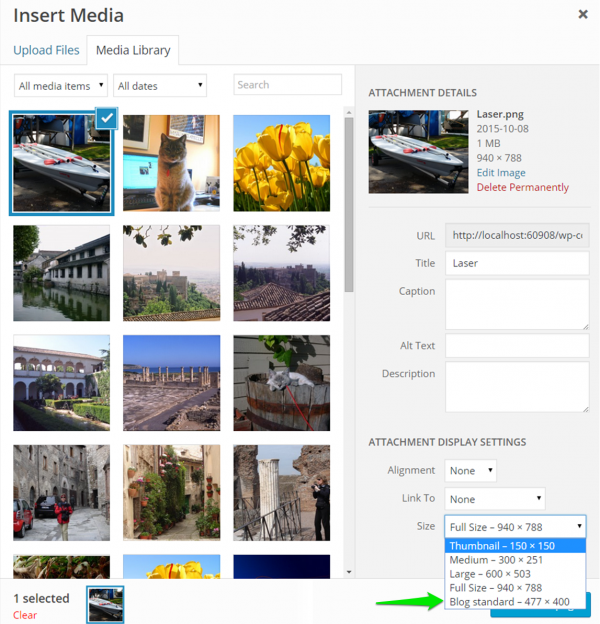
Now when I upload an image, the ‘Blog standard’ thumbnail is generated along with all the others. When I want to insert the new image from the Media Library, ‘Blog standard’ is one of the available options.
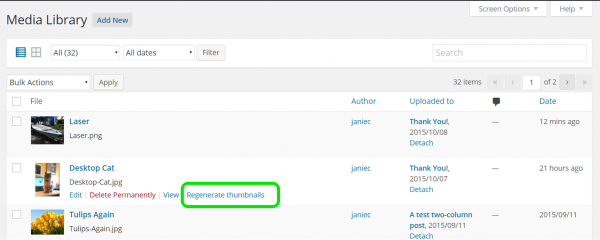
Simple Image Sizes also lets you generate new thumbnails for existing images. You can do them one by one, or in bulk. To generate the new thumbnail for individual images, just view the images in your Media Library and click on Regenerate Thumbnails as needed.
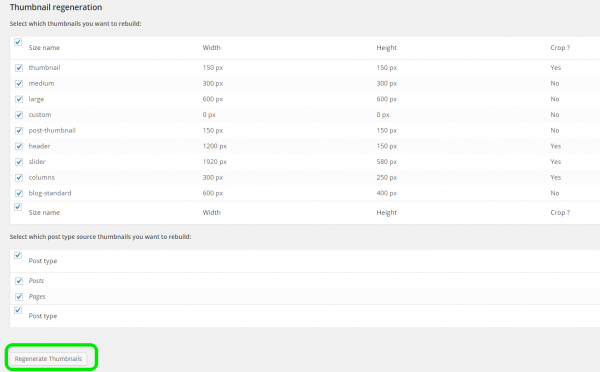
To apply new thumbnail sizes to existing images in bulk, go to Media Settings and scroll down to Thumbnail regeneration. Click on Regenerate Thumbnails … prepare to wait if you have a lot of images. And remember to Save Changes.
If you have a large library, consider whether or not you really need the new thumbnail size to be generated for every single image. Extra thumbnail sizes don’t affect your web page performance, but they do add to disk space.
In summary
WordPress generates different version of the images you upload. Minimize bandwidth impact by choosing the smallest thumbnail that’s still appropriate for the page you are editing. Make life easier for content editors by setting up custom thumbnail sizes to automate resizing whenever they upload images.
If your website is suffering from poor performance, it could be due to content, design, or your computing environment. Smartt offers website audit services which identify technical and content issues impeding your website’s marketing performance.

