 Branding
 Digital Marketing
 Web & App Dev
 IT Services
Tutorial: Using Views to Create a Drupal Blog
Skill level: intermediate
One of the most frustrating obstacles for a newcomer to Drupal is that there’s no built-in blog. For anyone who is used to WordPress, it’s reasonable to expect a CMS installation that defaults to a static front page and a blog. Not so with Drupal. A basic Drupal distribution ships with two content types: Article and Basic Page. That’s it. The front page is a list of all Articles and Pages marked with a ‘published’ status. There’s no such thing as content type Blog with its own special summary page.
Here’s a tutorial on how to create a blog in Drupal 7 using the Views module. This is a fun introduction to Views because it delivers instant gratification at every step while building a blogging function that fulfills the needs of most websites. Walk through this tutorial on a test site where you can play with the different settings and generate some dummy content.
This tutorial sets up a Drupal blogging function using the following steps:
- create a content type ‘blog article’ with a link on the main menu
- create a blog summary page
- create a block that lists most recent posts
- create a block that lists posts by category
- create a block that lists posts by archive date
- set up a role for content editors/bloggers
NOTE: Drupal 7 comes with a Blog module, which is for multi-user blogs. A website with a multi-user blog supports a separate blog for each authorized user. Each blog can be public or private, depending on the viewer’s role. The ‘multi-user’ terminology can be a bit confusing because at first glance it implies that a single-user blog (which is what we are building in this tutorial) supports only one blogger. Single-user just means there is a single blog for the website and any authorized user can contribute to it.
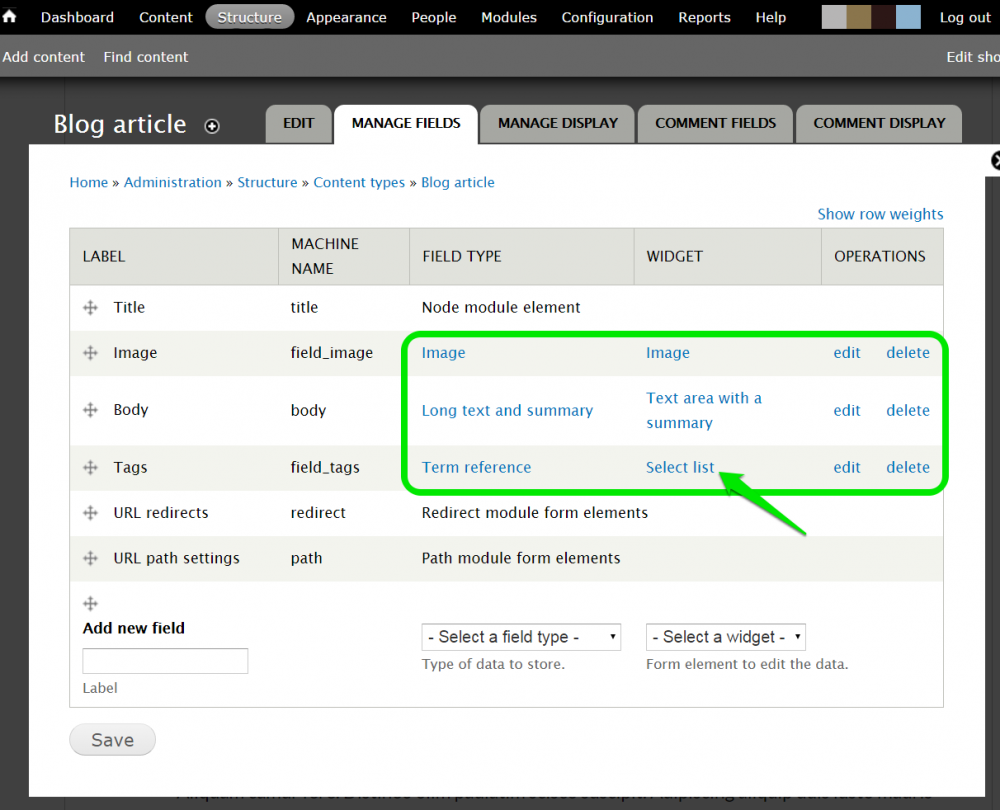
Create a Blog Page
This is pretty straightforward: from Administration » Structure, select Content Types and add a content type. In this example, I’m calling it ‘blog article’. Keep the fields simple: an image, a text body, and tags. Since I have tags set up in Taxonomy, I can use the Select List widget for Term references to make it more convenient for bloggers to tag their content.
NOTE: if you don’t feel like adding a bunch of blogs manually, this is a good time to generate some fake content so that you can see what your ‘blog article’ pages look like. It’s useful to create some users and meaningful tags first to make things look real.
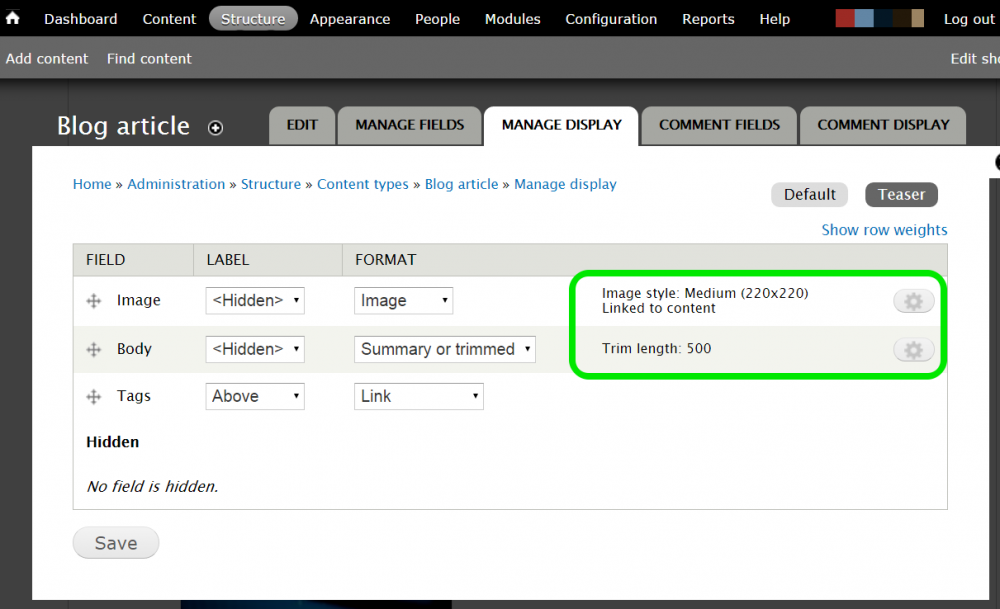
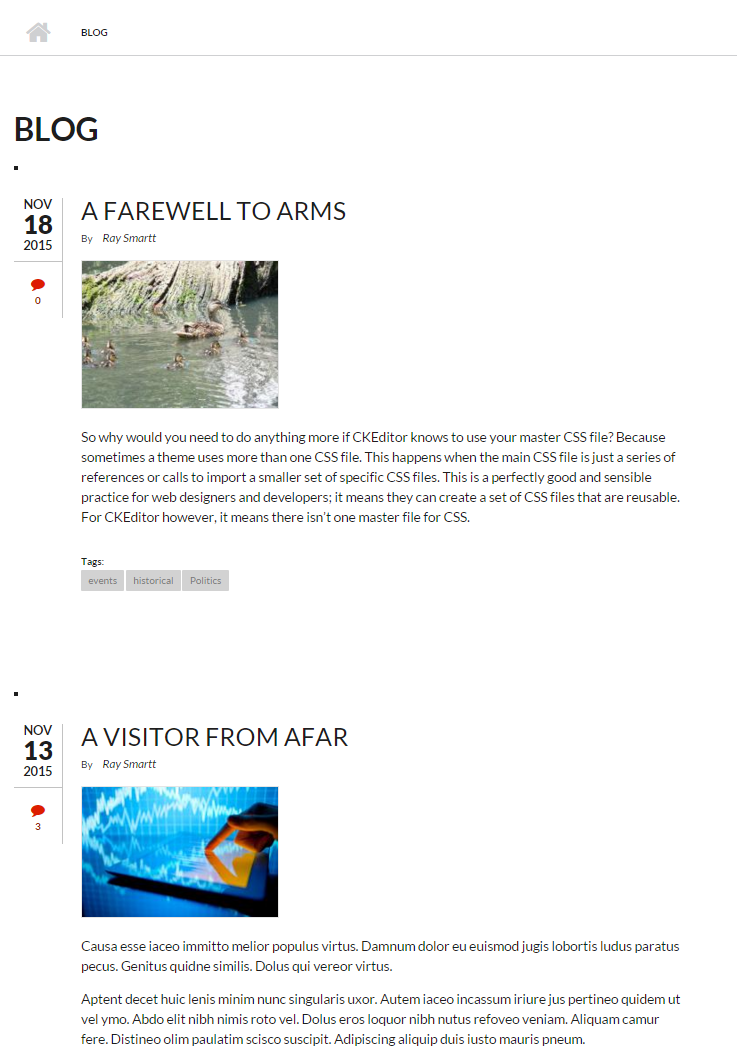
As part of creating a ‘blog article’ content type, you need to set up the ‘teaser’ because the blog summary page will take its content from the ‘teaser’. To define what a teaser looks like for a blog article, click on the Manage Display tab and then click on Teaser to set image size and text length. Then SAVE the page.
Create the Blog Summary
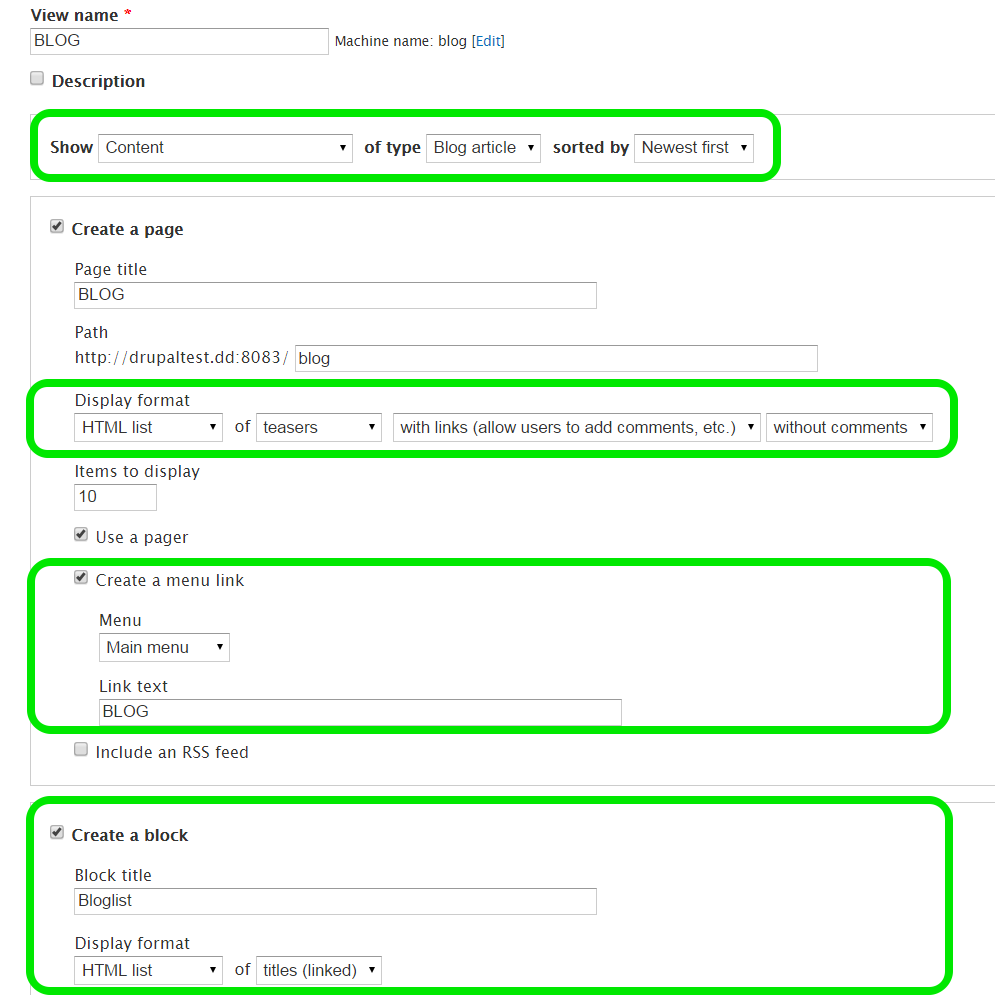
The blog summary page is just a View which displays ‘blog article’ teasers. Views has some pre-defined features that make it easy. From Administration » Structure » Views, add a new View. For this example, I’m calling it BLOG. The critical settings are:
- Show content of type ‘blog article’
- Create a page with a page title BLOG
- Display format that’s an HTML list of teasers
- Use a pager
- Create a menu link to the main menu with link text of BLOB
Then we also need to Create a block that contains just an HTML list of blog titles. This is the block we will use for the ‘Recent Posts’ list we are going to assign to the sidebar. I’m calling the block title ‘Blog List’ just to make it easier to find later in the list of blocks. This just needs to be set to an HTML list of titles (linked).
Now when you press SAVE, your blog summary page is live.
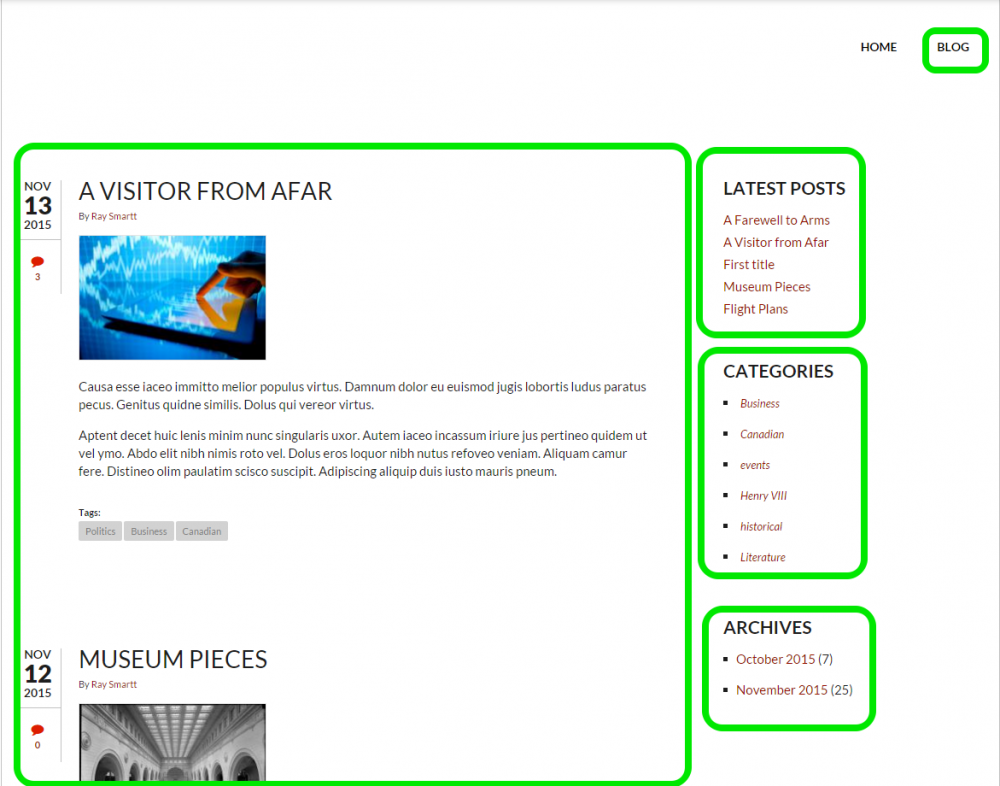
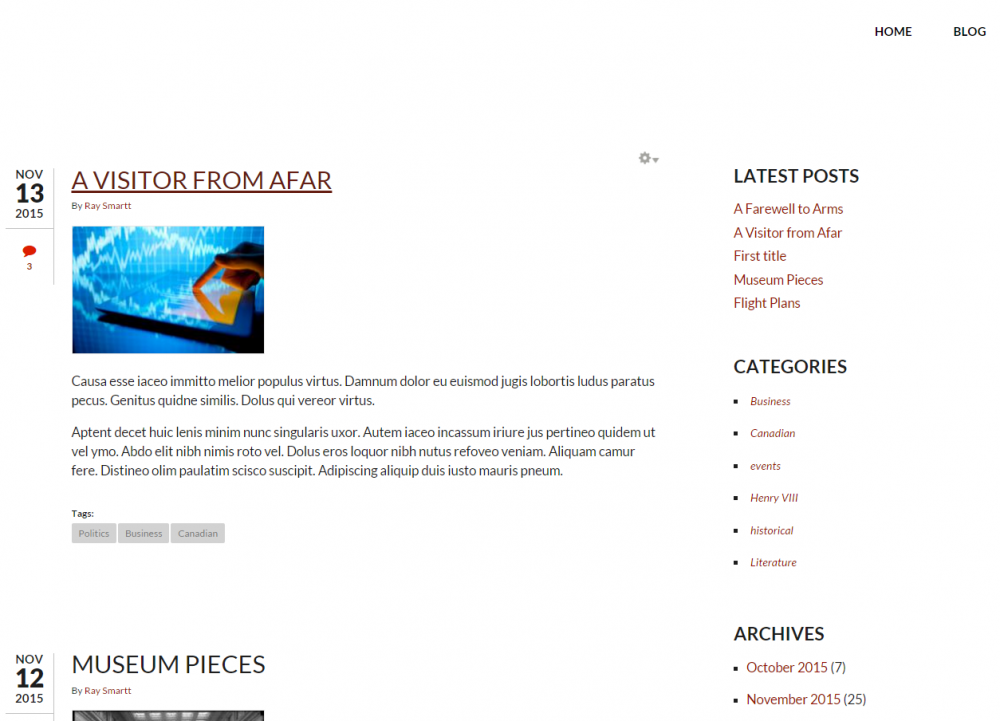
Create a block that lists most recent posts
Couldn’t be easier. Already done. Remember the block called ‘Blog List?
The Page and Block are ‘displays’ of the View we built. A display is a variation of the View and can be customized as needed. The View provides default settings that you can override or add to when creating a display. By default this View’s Pages and Blocks use all the same filter criteria: content type ‘Blog article’, sorted by most recent post. The benefit of a display is that instead of creating a different View, the display piggy-backs off the View and saves Drupal a bit of extra work.
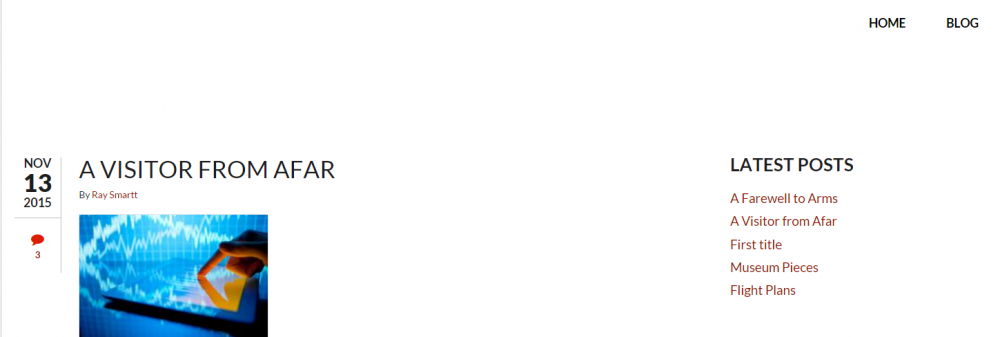
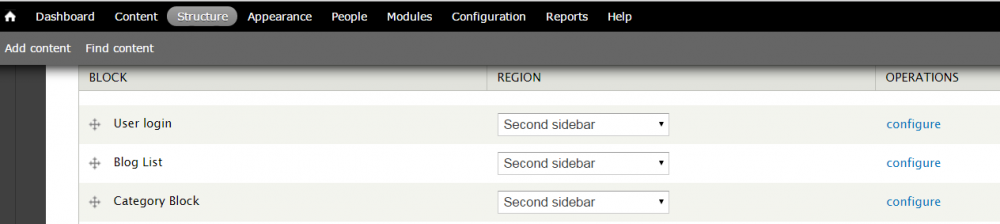
Now it’s just a matter of assigning it to a region of the web page. Look for ‘Blog list’ in Administration » Structure » Blocks, where it will be under the list of Disabled blocks. Click on Configure beside the block and give it a Block title – a display name for the block, such as ‘Latest Posts’.

Then assign the Blog List block to the Second sidebar (which is positioned as the right sidebar in this theme) and SAVE.

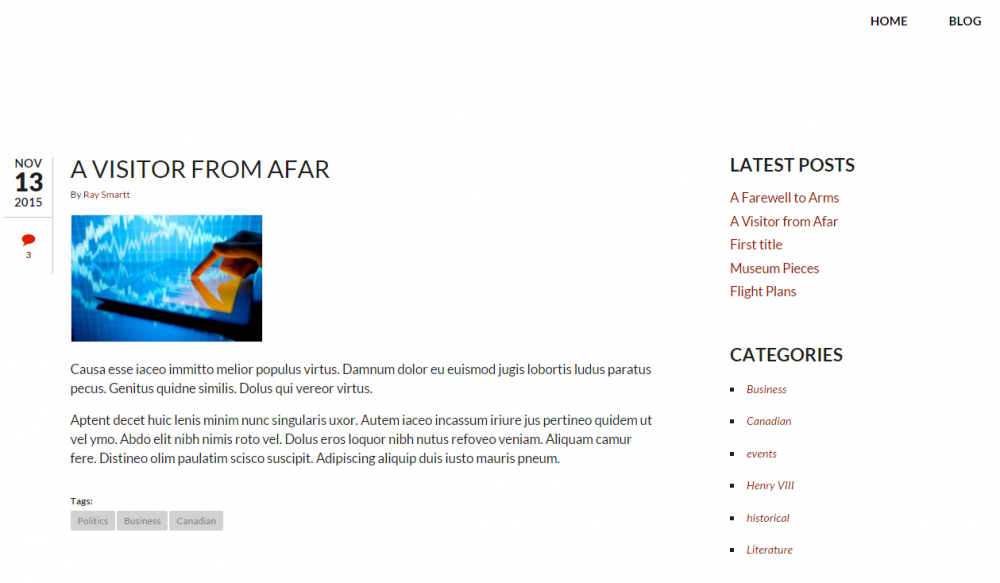
Now there is a block on the right sidebar with a list of latest posts.
Create a block that lists posts by category
Tags are the most common way to categorize blog posts. The Tags vocabulary is part of every Drupal installation, so you don’t need to set up any taxonomy for this. To create a block that lists terms from the Tags vocabulary, we need to create a new View.
- Call this View ‘Categories’ and set it to Show all Taxonomy terms that are Tags.
- We don’t need a page, we just want a block, so untick ‘Create a page’ and tick ‘Create a block’.
- Give the block a title, and set Display format to HTML list.
- Leave ‘Items per page’ blank to display all tags.
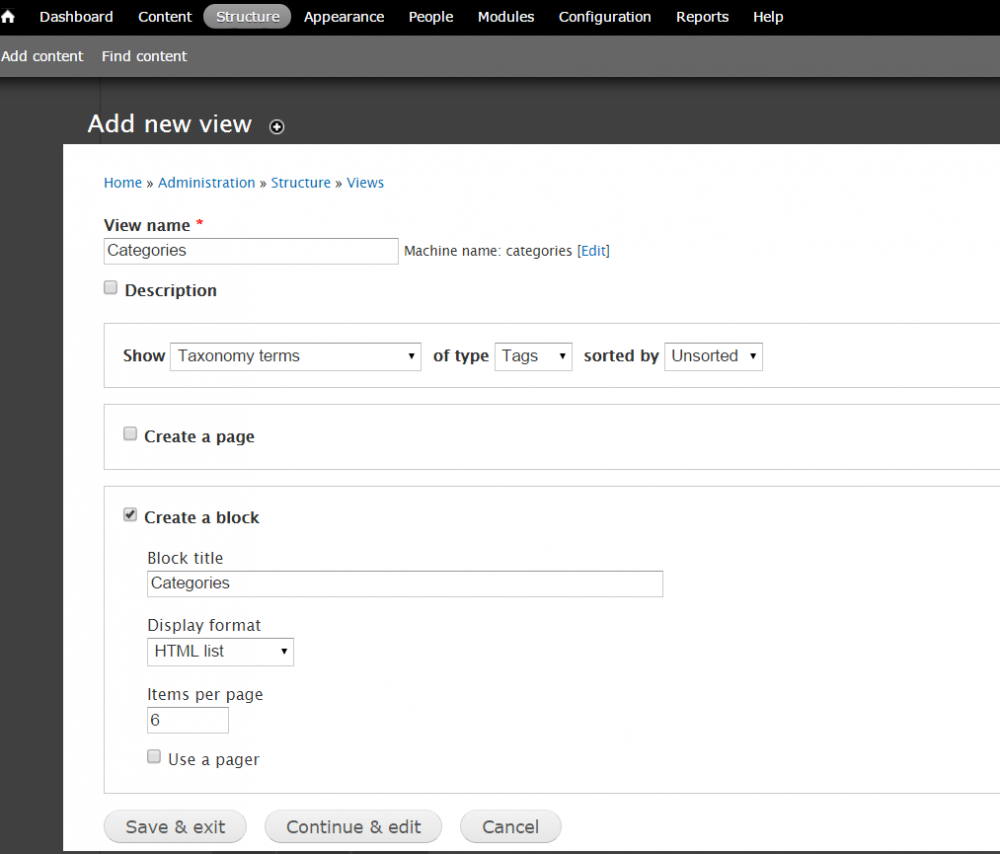
Then SAVE and Exit.
Now from Administration » Structure » Blocks, assign the block to the Second sidebar and SAVE.
And the right sidebar now features a Categories list.
Create a block that lists posts by archive date
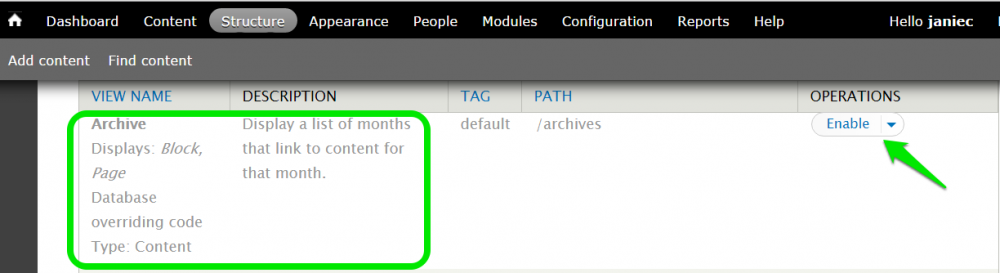
The last block for the sidebar is lists posts by dates. Fortunately the Views module comes with a ready-made Archive view, which makes this an easy block to set up. From Administration » Structure » Views find the View called ‘Archive’ and enable it.
The default Archive view is by month, which is fine. So all that’s left to do is assign the block to – yes, Second sidebar.
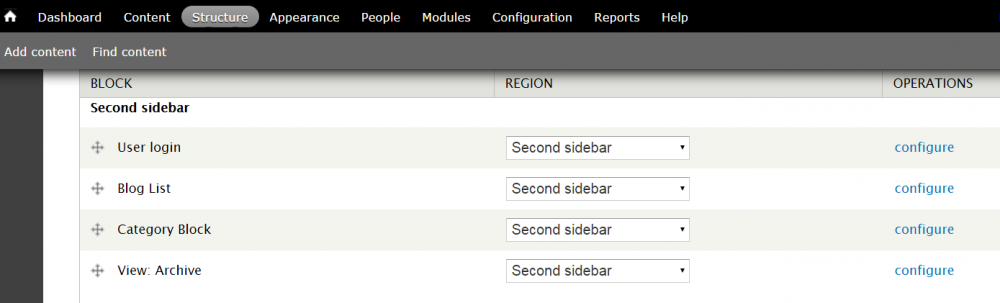
SAVE, and now a list of blogs summarized by month and year is featured in the right sidebar.
Set up a role for content editors/bloggers
Drupal’s default user roles are: Anonymous, Authenticated, and Administrator. Rather than edit the default permissions for these roles, it’s best to create a new role for content editors/bloggers. This allows more fine-grained, specific, and secure control over permissions. From Administration » People » Permissions » Roles, create a new role called Blogger using Add role.
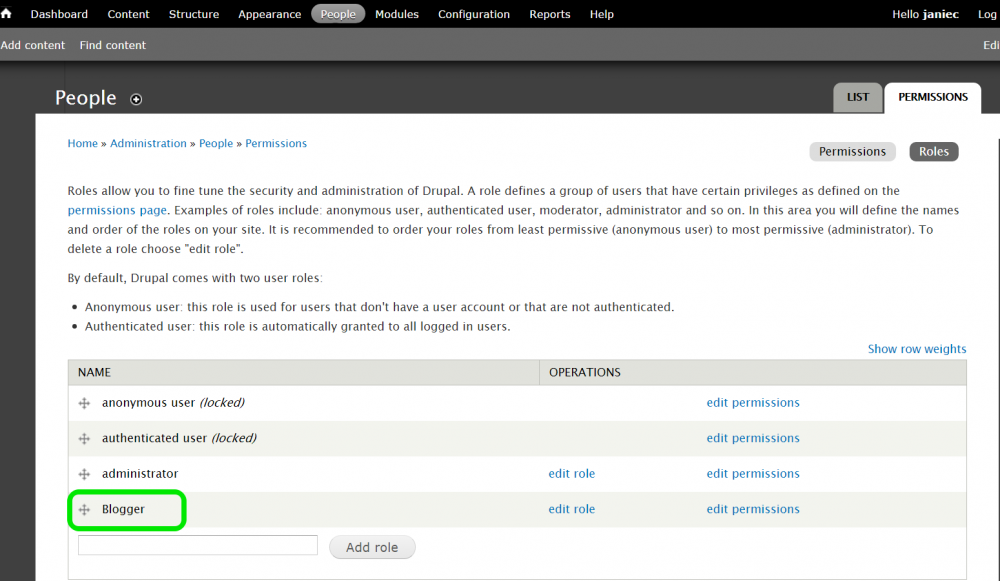
When you click on the Permissions button, you’ll notice that because we created a new content type ‘Blog article’, there are now permission settings for that content type. There may be other permissions you want to assign to Blogger, but here is where you allow Blogger users to create and edit blog articles.

Now the site has a blog based on a specific content type, which also gives you more control over user roles and permissions. Users can look for blogs by most recent posts, category, and archive date. There were a lot of steps involved, but none of them were very difficult. Best of all, this was a quick and meaningful introduction to Views, one of the most indispensable modules in Drupal.
If you feel your website could use a refresh and wondering if Drupal is the right CMS platform for you, contact us about our Web development services.

