 Branding
 Digital Marketing
 Web & App Dev
 IT Services
Drupal Blocks: A Tutorial for Advanced Content Editors
If you’ve ever wanted to move content around or add customized content to your website’s layout, there are 2 main options familiar to Drupal users:
- Blocks – part of Drupal 7 core
- Panels - a contributed module
This blog helps site editors understand how to work with blocks and regions. We will show two examples:
- Move content from the Right sidebar region to the Left sidebar
- Add a block of customized content to a region
To maintain design integrity, you should always have a designer plan and structure your website. However, it’s not always practical to have a designer implement every change when there’s a long line up of projects waiting for design resources; sometimes marketing teams must make tweaks on their own. It’s still best to discuss the changes you want with a designer, but once those changes are approved, content editors with advanced Drupal skills (let’s call them site editors) can make simple modifications without resorting to code. More on best practices later.
What are Blocks and Regions?
Drupal themes are designed with regions. These are pre-defined areas in your template which can be used for content. Think of regions as zones in your website’s layout. Headers, footers, sidebars, and main content are regions you can expect to find in a theme.
Blocks are boxes or containers of content. Typical blocks contain text, images, media, menus, or links. Blocks are assigned to regions. You can assign a navigation block to a Left Sidebar (region) or a search form block to a Header (region). Obviously, for visual appeal, the content in a block needs to be compatible with the height and width of the region.
If you don’t see Structure as one of your Administration options, it means your role does not allow access to Blocks or making changes to structure. If you think the functionality is useful, see whether you can get more privileged access to a non-production server and try things out.
Get your bearings: know your regions
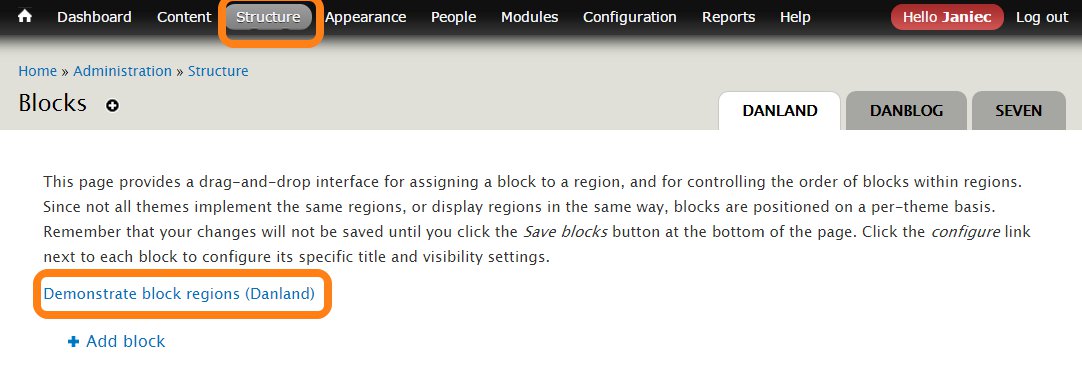
Every theme provides a ‘map’ that displays the available regions of a page. From Administration / Structure click on the Demonstrate block regions link to display the regions for this theme. For this example, we are using the popular Danland contributed theme.
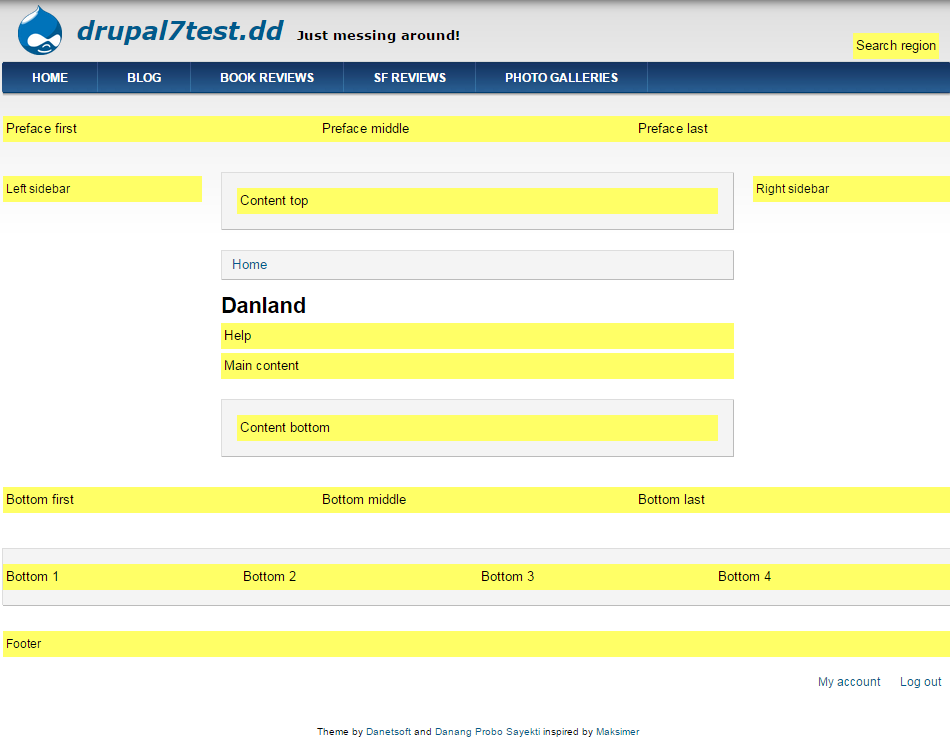
The available regions for this theme are highlighted in yellow. Depending on the theme, a page can have fewer or more regions than this example. Regions can be added or removed from the theme in code.
Moving a Block
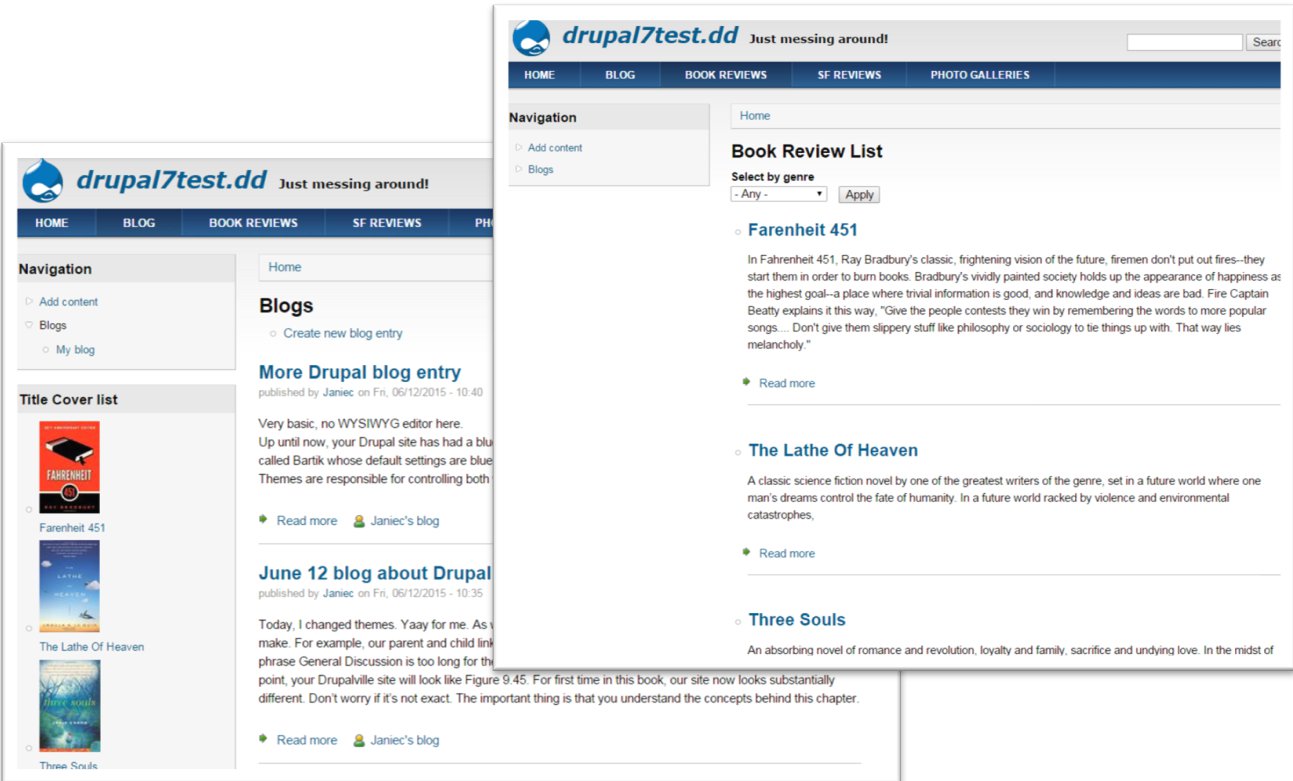
In this example, we will move the TitleCover Block from the Right sidebar to the Left sidebar.
NOTE: TitleCover Block is a custom View we created. For an explanation of how to create a custom View, see Step 4: Create some handy Views from the blog Drupal Tutorial: Using Taxononmy, Content Types, and Content Fields.
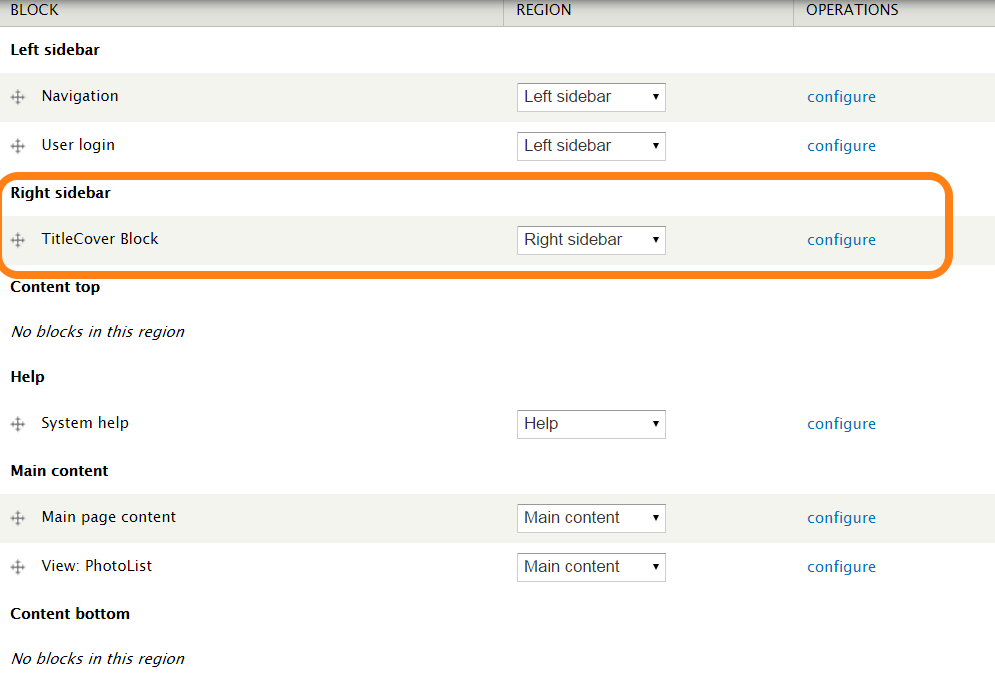
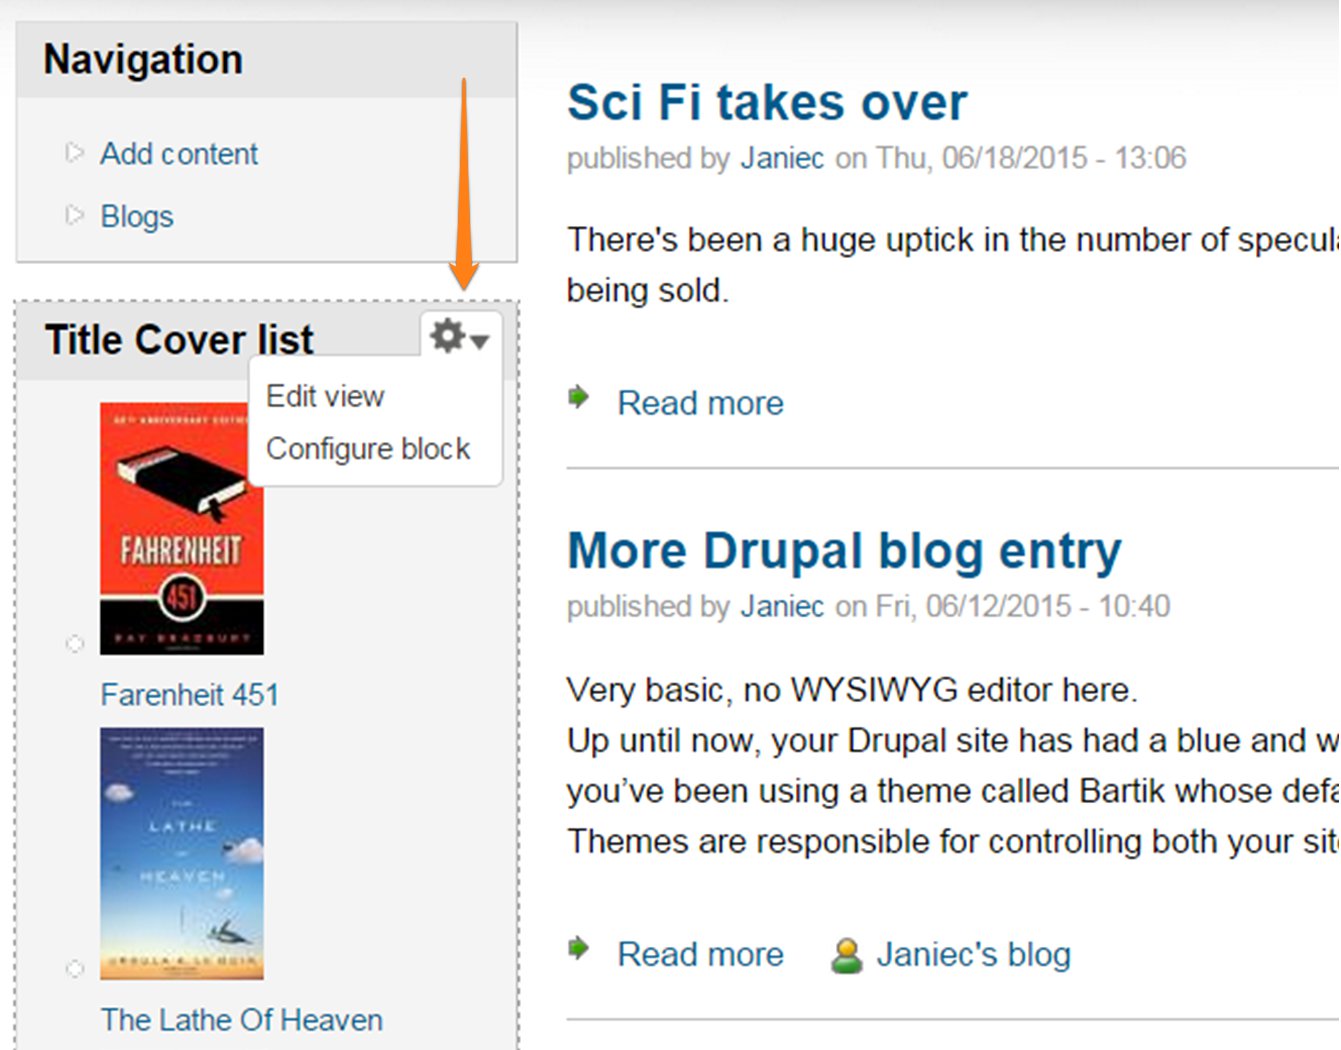
To see the block management screen go to Administration / Structure / Blocks. This screen lists all the regions and all the active blocks assigned to each region. If a block is enabled, the center column displays a drop-down menu to let you change regions for the block and configure the block.
Here we find TitleCover Block listed under the Right sidebar. To make changes, click on configure.
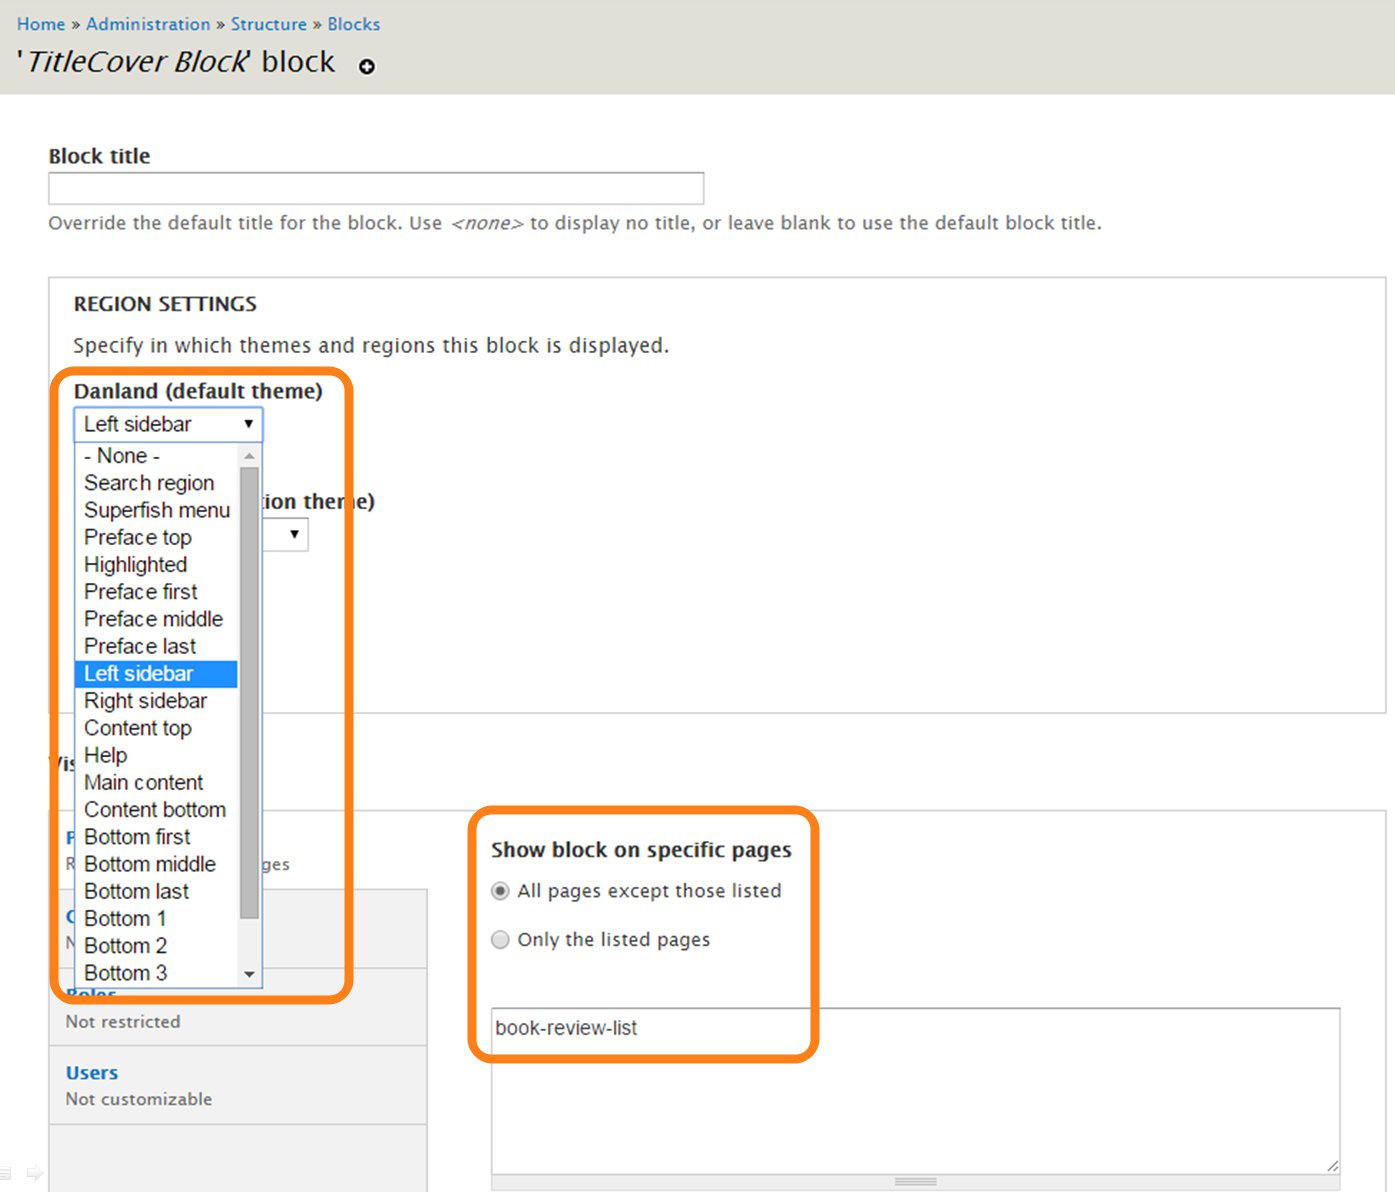
This brings up the block configuration screen (below). It shows all the enabled themes. For this example, we want to change the region in the Danland default theme from Right sidebar to Left sidebar.
We also want to prevent TitleCover block from displaying on the Book Review List page. To do this, under Show block on specific pages, select All pages except those listed. Then we enter the path of the Book Review List page and SAVE the changes.
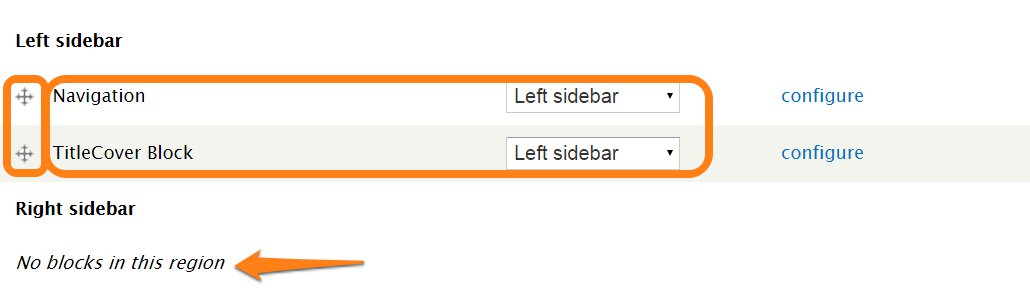
Notice that in the block management screen, TitleCover Block is now listed under Left sidebar and that Right sidebar no longer contains any active blocks.
One more detail: since Navigation and TitleCover share the same region, it’s best to specify which displays first. You can use the drag function to change the order of the blocks within a region.
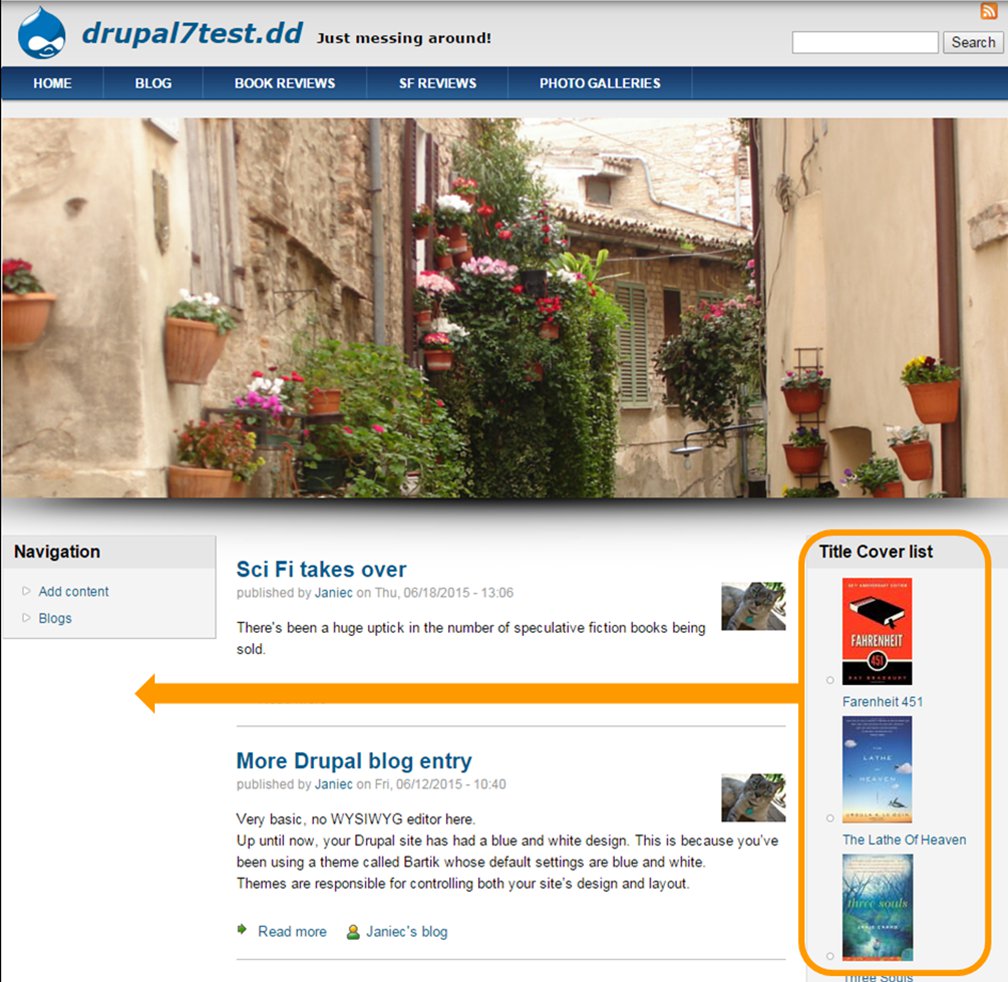
Now look at how the Home page has changed. The TitleCover block displays in the Left sidebar now, below the Navigation block. And since there isn’t a right sidebar anymore, the Main content region uses the rest of the page width.
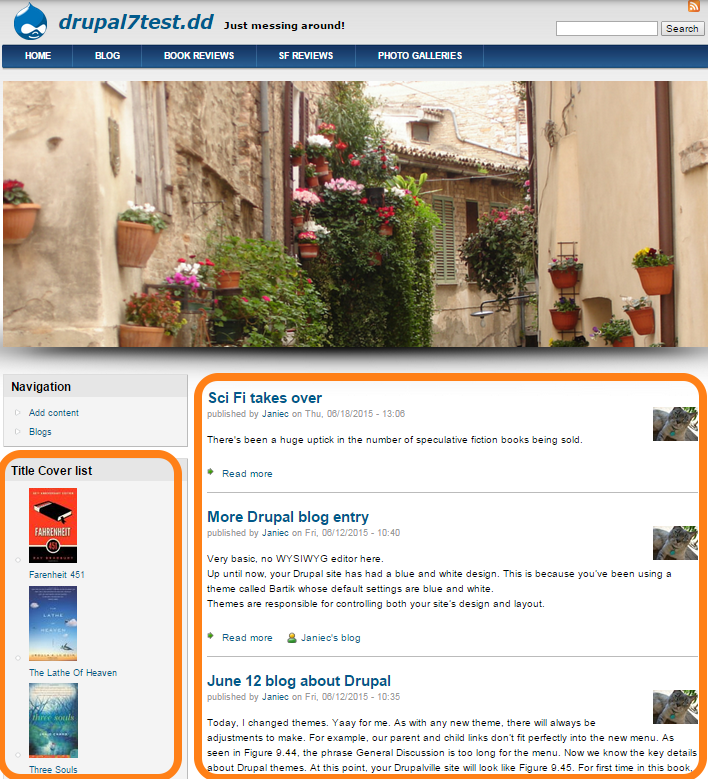
All other pages now display the TitleCover block on the left sidebar. The exception is the Book Reviews List page, which doesn’t display the block at all.
Handy Hint: how can you find out what those blocks are called? All you need to do is mouse over to the upper right of the block and find the gear icon, then select ‘Configure block’. This is also another way to bring up the block configuration screen, which displays the name of the block.
Add a new block to a region
As we point out in the blog post How Taxonomy Affects Your Drupal Website, if you know what kind of content you need to have and how you’ll be using it, good information architecture promotes good design that makes life a lot easier for content editors.
There may be occasions, however, when you need to display information you didn’t plan for. This is where blocks of custom content can help. In this example, we will create a block of content to promote a sale and add it to the Right sidebar.
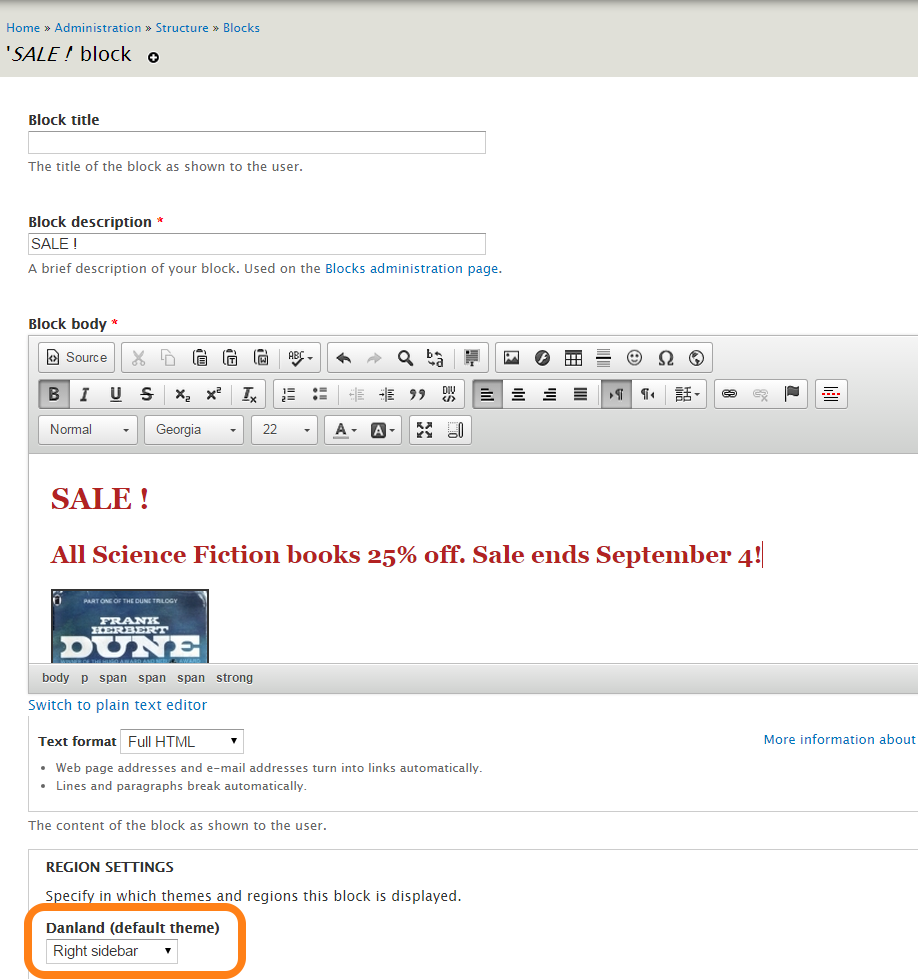
To create a new block, go to Administration / Structure and click on Add block to get to the Blocks editing screen. If you have installed a WYSIWYG editor such as CKeditor, it’s easy to format fonts and insert images. In the example below we:
- create a block called Sale! with promotional text and images.
- assign this block to a region by selecting Right sidebar from the Danland theme under Region Settings.
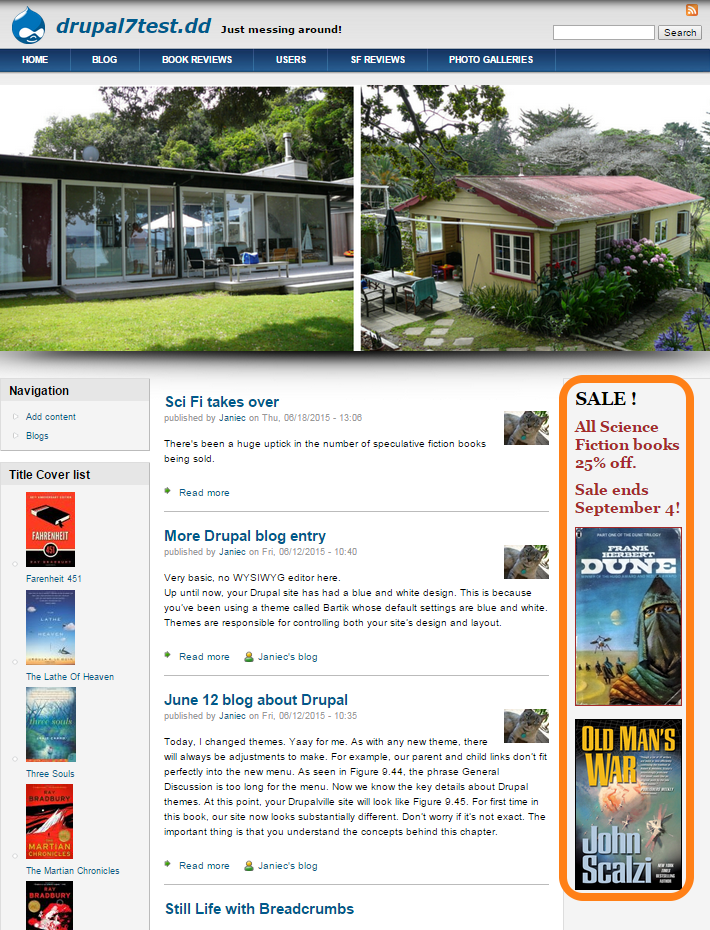
This is the result:
Best practices
Depending on the theme designer’s intent and attention to detail, you will have varying degrees of freedom to customize the blocks of content you assign to regions.
However, recognize that just because you’re able to customize doesn’t mean you should. Just because the Danland theme allows us to implement the two examples in this blog doesn’t mean we are following best practices because:
- we risk losing visual integrity ; too much freedom means we could end up using fonts and colors which spoil the overall look of the design
- we end up styling blocks one by one; if we do this with too many blocks it creates problems with consistency, not to mention the amount of work should you decide to change them
It may seem simpler and faster to create a Sale block on the fly, but what if you need to create/edit a new Sale block each month? Or display a different promotion for each web page? If you decide that all images within a Sale-type block must have a blue border, there’s a good chance you’ll forget to add that border when you do it manually. You’ll spend far less time tweaking and editing for consistency if all that styling – and even the blocks – are pre-defined.
Blocks and regions offer flexibility, but ideally they should be part of a well-planned website. The styling should be standardized and located in the theme’s code. If it looks as though you’ll be using the same type of content and custom styling on a regular basis, get some design resources. Take the time to review your information and design strategies. Then get a designer to modify your theme to ensure visual integrity. With CSS that defines the new content types and styles you need, you won’t have to specify font, size, spacing, border or other attributes. It becomes just a matter of entering text into fields and uploading images. Furthermore, with designer involvement, you’ll end up with a professionally-designed block that enhances the look of your website and promotes conversion.
In our next blog, we will cover Panels.
Good information architecture and proper requirements definition produce websites that deliver business results and which are easy for teams to maintain. Contact us to learn how we can help with website planning, design and development.

