 Branding
 Digital Marketing
 Web & App Dev
 IT Services
Canva Product Review: Simple Design Tool for Social Media and Content Marketing

We’re always looking for ways to execute more efficiently in Marketing. Sometimes that means simplifying our processes and sometimes it means each of us learning extra skills so that we’re more self-sufficient. When you do a lot of content marketing and need accompanying images, you learn pretty quickly that finding those images and processing them eats up time. You know: find the right image, crop and resize, add text, do some tweaking.
We buy stock photography and we know how to resize. We each have our own little tricks for creating images (Powerpoint anyone?). We have in-house designers but when there’s a client project on deadline, the client is the priority. Not Marketing.
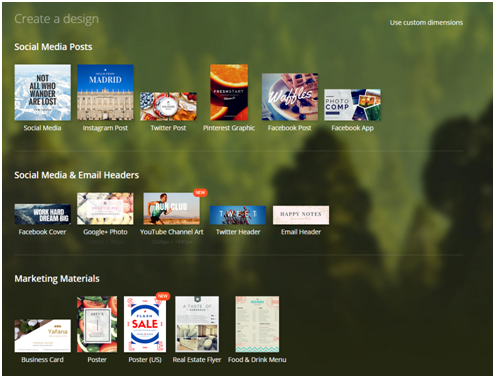
Canva is a free tool that’s been designed with busy marketing teams in mind. It provides galleries of images, layouts, and backgrounds. Some are free, some cost. The cost is one dollar each. And of course you can upload your own images. Then apply text from a gallery of text styles and fonts, or add shapes. When you’re finished, Canva lets you download the image or share on social media.
In my opinion, the best time-saving feature of Canva is that it provides a choice of templates sized for social media use. Whether it’s a Facebook post, a Twitter header, or Instagram, you can work with those templates and be confident that the image Canva downloads will present well and meet the required dimensions for those social platforms. It’s not meant to replace full-featured image processing and creation software such as Photoshop. It’s meant for busy marketing teams who need to produce simple, impactful images on a regular basis. Quickly.
As an example, let’s look at the dreaded Facebook cover photo. Facebook publishes the exact dimensions and a designer would be all set up in a heartbeat. However, if you’re in a rush and there’s no designer around, it can get pretty finicky trying to adjust your image and text so that key visuals don’t end up hidden behind that 160 x 160 profile photo.
(Image courtesy Facebook)
I’m doing some pro bono work for a grassroots movement called Authors for Indies, an event to support Canada’s independent bookstores. Here’s a walk-through of how I used Canva to create a quick Facebook cover photo for the event. We've provided 14 different cover photos for bookstores to use.
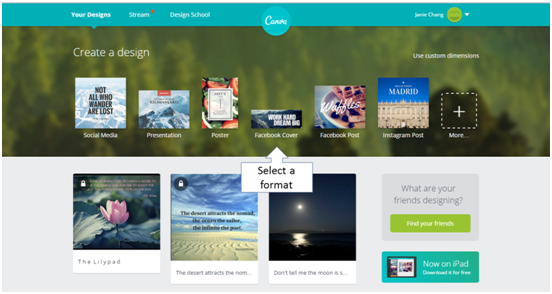
To begin, select the Facebook Cover design format (above) and Canva sets up a page with your design (below).
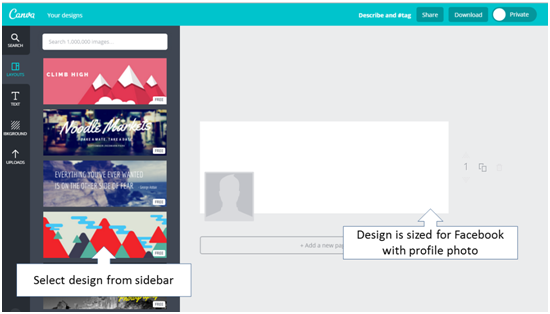
You can now select a pre-designed template (layout) from the sidebar. Free designs are clearly marked. You don’t get charged until you actually download the finished design, so you can play around with as many as you like. Or, you may already have your own image that you want to use:
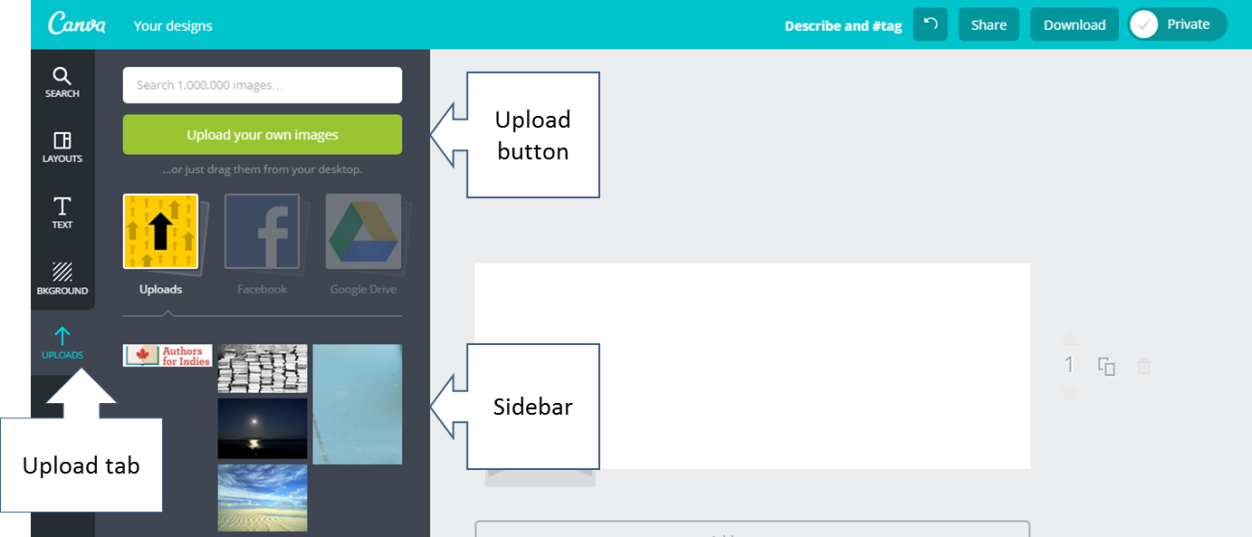
If you’ve got your own image, use the Upload button to browse for images on your desktop. Once you’ve imported an image, it shows up in your sidebar.
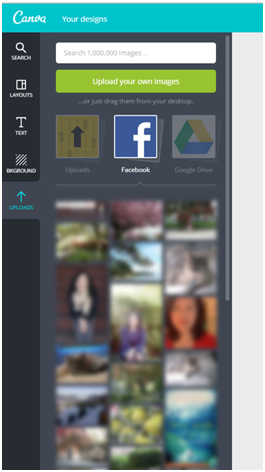
If you’re logged into Facebook, Canva also lets you view and select your Facebook images from the sidebar.
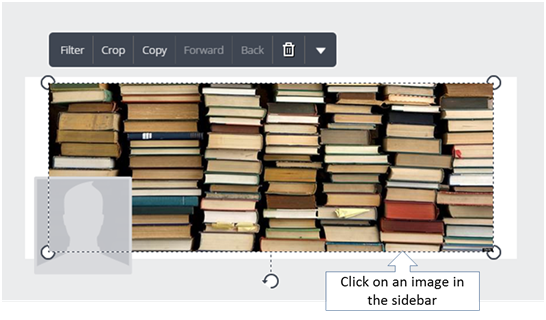
To drop an image into your design, just select an image from the sidebar by clicking or dragging it to the design. Select as many as you need.
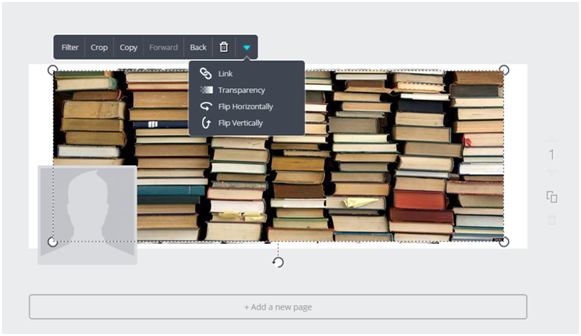
Once your image is in the design, you can drag to resize, filter, crop, copy, flip, adjust transparency, or embed a link. What I want to do is add some text and put it on a simple, solid background so that it’s easy to read.
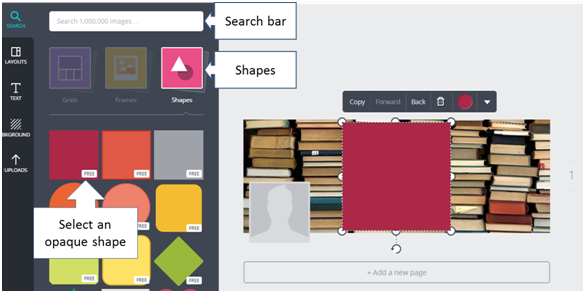
First, the shape. Click on the search bar to get a list of search options, and from those options click on Shapes. From the sidebar, select a shape, in this case a simple opaque square. I want my text to go on a white banner that runs the width of this design.
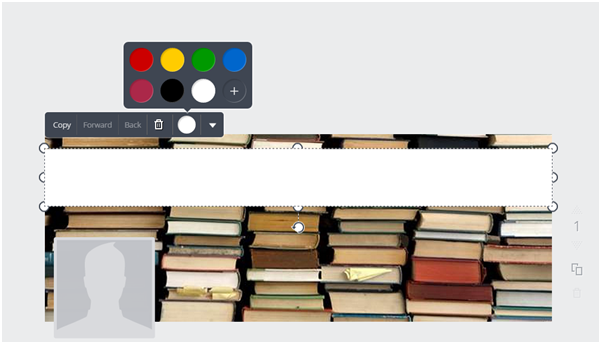
Grab the image handles to resize the shape, and use the colour palette to change from red to white.
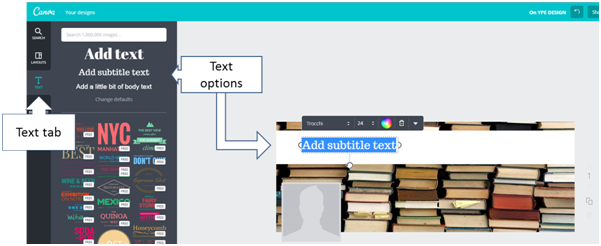
Then select the Text tab to bring up text options in the sidebar, and select a text option. You can change font, font size, font colour, and even text spacing. Drawing guides help you align your images and text.
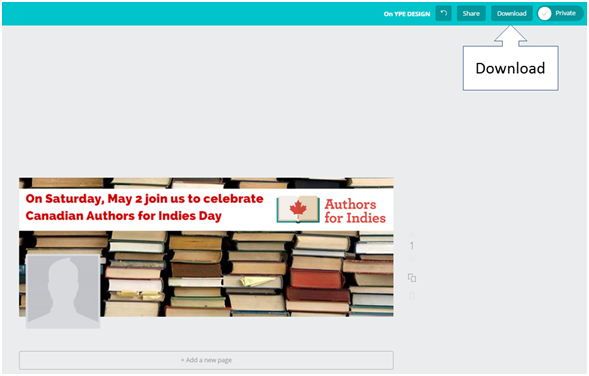
You can bring in text and images at any time. Here, I’ve added the event logo. When you’re happy with the results, just download and use. If you’ve chosen any images that are not free, this is when you get charged a dollar for each. The downloaded images will not download with the photographer’s watermarks. You’ll see the watermarks on your design in Canva, but they won't be on the finished image.
Perhaps my only nit is that the Canva home page tries to make you sign in and start playing with the product. But if you’re like me and prefer to know what you’re getting into first, you can avoid that. Just scroll down and click on the About link to read about Canva’s features. I also highly recommend their Design School link, which provides excellent tutorials that guide you through a series of exercises that actually get you using Canva right within the tutorial.
Canva has turned out to be a big time-saver for me. I still spend time hunting for the best images either in Canva or elsewhere -- but that’s something you have to do anyway. However, once the image is in your Canva design, you have a single tool that lets you create an image that downloads to the exact specifications you need.

