 Branding
 Digital Marketing
 Web & App Dev
 IT Services
WordPress Tutorial: How to Restrict Content from Anonymous Users
Site Editor Skill Level: Easy
It’s a pretty common scenario: how to let logged in (registered) users see pages or posts but prevent logged out (anonymous) visitors from seeing them. This tutorial demonstrates a simple example you can build on to suit your needs.
The functionality I want to implement is the ability to:
- Create a page that contains user login and registration forms
- Create pages that are hidden from logged out users
- Create menu items that are hidden from logged out users
- Set all logouts to redirect to the Home page (just to be tidy and consistent)
Plugins you’ll need
You will need to install these three plugins:
- WP-Members: an easy-to-use plugin that lets you restrict blog pages or posts based on login status. Customize registration forms and more. The documentation includes both a Quick Start Guide and an online Users Guide that covers all the settings. In this blog we will just show the settings and steps needed to fulfill the functional requirements above.
- Nav Menu Roles: a plugin that hides menu items based on role (because WP-Members protects page and post pages but not menu items).
- WPi Custom Logout: a plugin that redirects the Wordpress logout to send users to your Home page. The WP-Members logout sends users to the Home page but the WordPress default logout sends users to the WordPress branded login screen; we want all logouts to deliver a consistent experience.
Check WordPress settings
WP-Members will alert you if any WordPress settings prevent it from doing the job, but here are the main ones to check:
- Settings > General: Membership – Uncheck ‘Anyone can register’
- Settings > Permalinks: Use anything but the Default. Optional but it’s easier to assign special pages when the URL and page titles provide context.
- Settings > Discussion: Select ‘Users must be registered and logged in to comment’ if you want to restrict blog comments. If you set WP-Members to restrict anonymous users from seeing blogs, this setting is redundant.
WP-Members settings
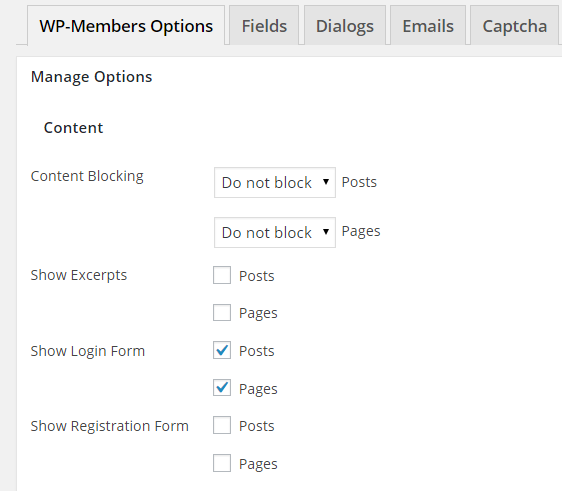
There are tabs for five types of settings: Options, Fields, Dialogs, Emails, Captcha. The last four are pretty self-explanatory but here are a few things to understand about the Options.
Content Blocking: the default is Block posts and Do Not Block pages. This means only logged in users can see posts and everyone can see pages.
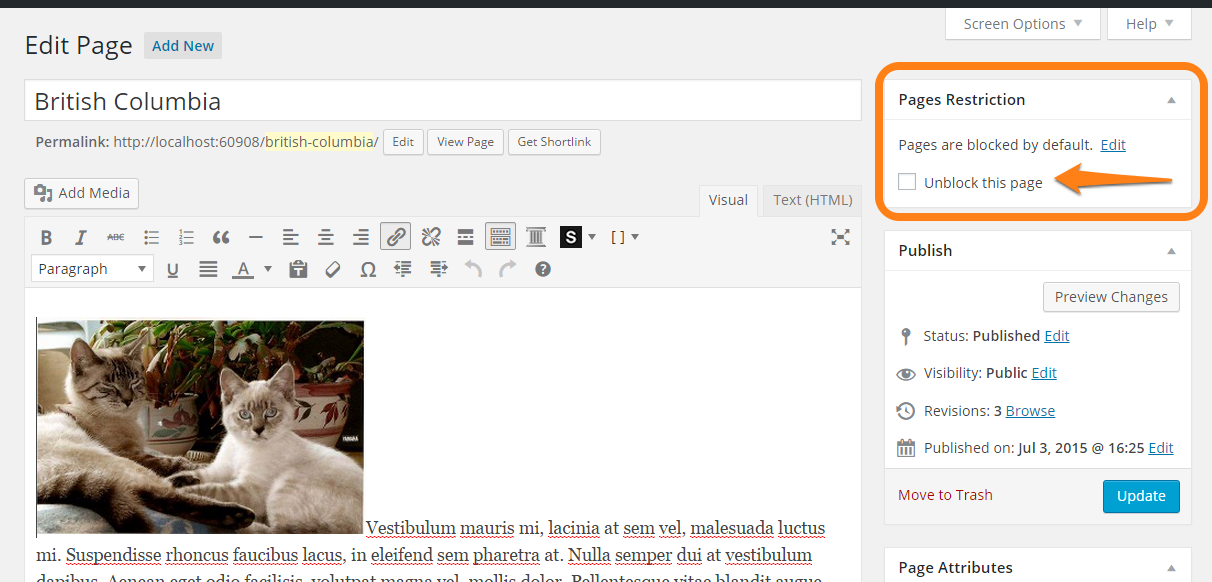
This is just a default setting by the way. WP-Members lets you set blocking on a per-page or per-blog basis. You may want to think about how much manual blocking or unblocking you’d have to do given the default you select; for example, if you have more private pages than public ones, then you might want to set Block pages by default and manually unblock the few pages of content that are for public viewing. You can do this in Edit mode, where you'll see a Pages Restriction setting (below).
Show Login Form: If you’ve blocked either Posts or Pages, this setting presents a login form to users when they try to access blocked content (see under Content Blocking). There is another setting to Show Registration Form, but it presents an entire form with all the fields, which can be rather ugly. Instead, use the next two settings.
Register Page & User Profile Page: If you specify a page for these settings, WP-Members will create links for registration and forgot password with the login form. This is much cleaner than showing an entire registration form. I’ve specified a page created for this example called Members. You can create such a page later and come back to fill in these settings.

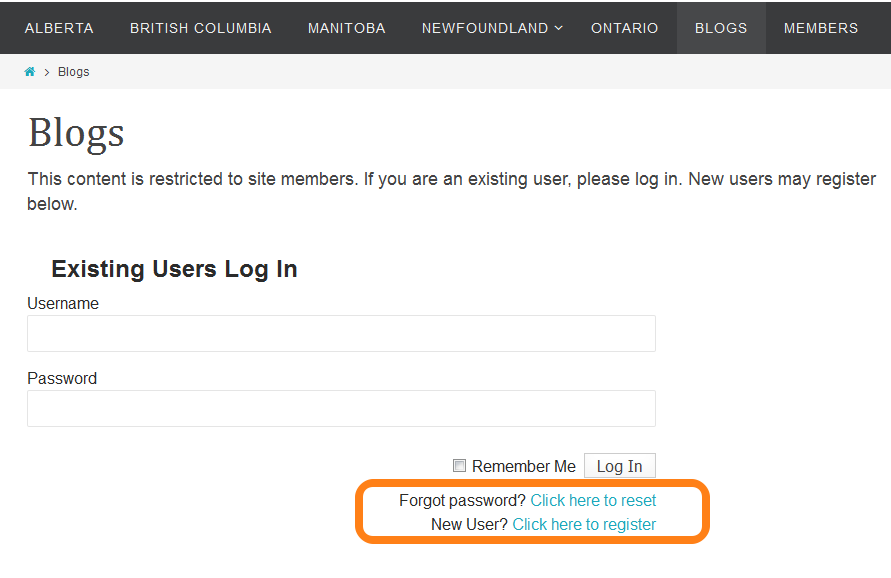
With Register Page and User Profile Page set, WP-Members provides links to Forgot password and New User registration with the Login form, which look much cleaner.
For this tutorial, I have created two pages for logged in users only. It’s not a lot of work to restrict two pages manually, so I’m setting Do not block for all pages and all posts. The two pages which I’ll restrict manually are sub-pages Members Only and Exclusive Content, found under Members (the designated registration and login page).
Create a registration page
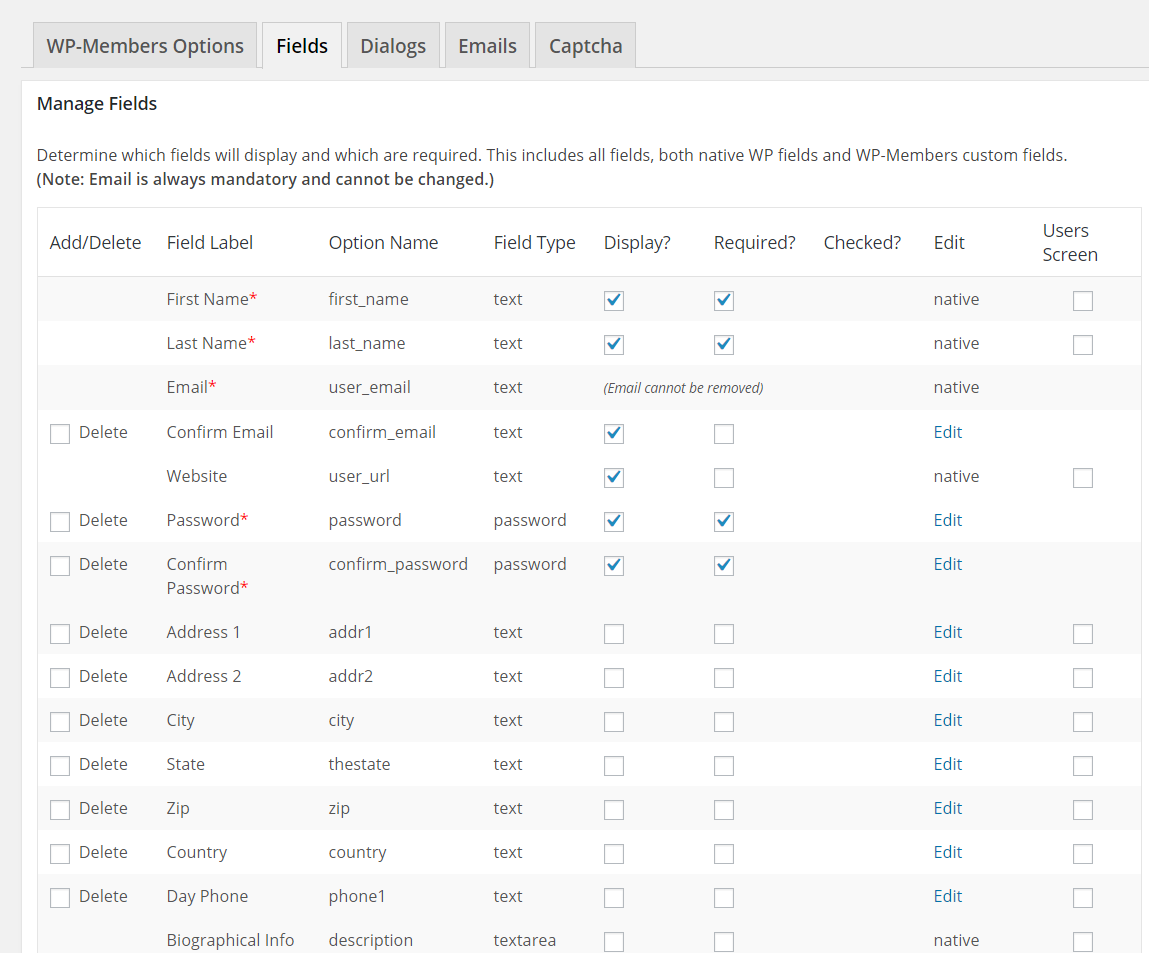
As you can guess, WP-Members’ Manage Fields tab is where you configure fields for the user registration form. There are pre-configured fields and you can also define your own fields. Drag and drop the rows to change the order of field display in the form.
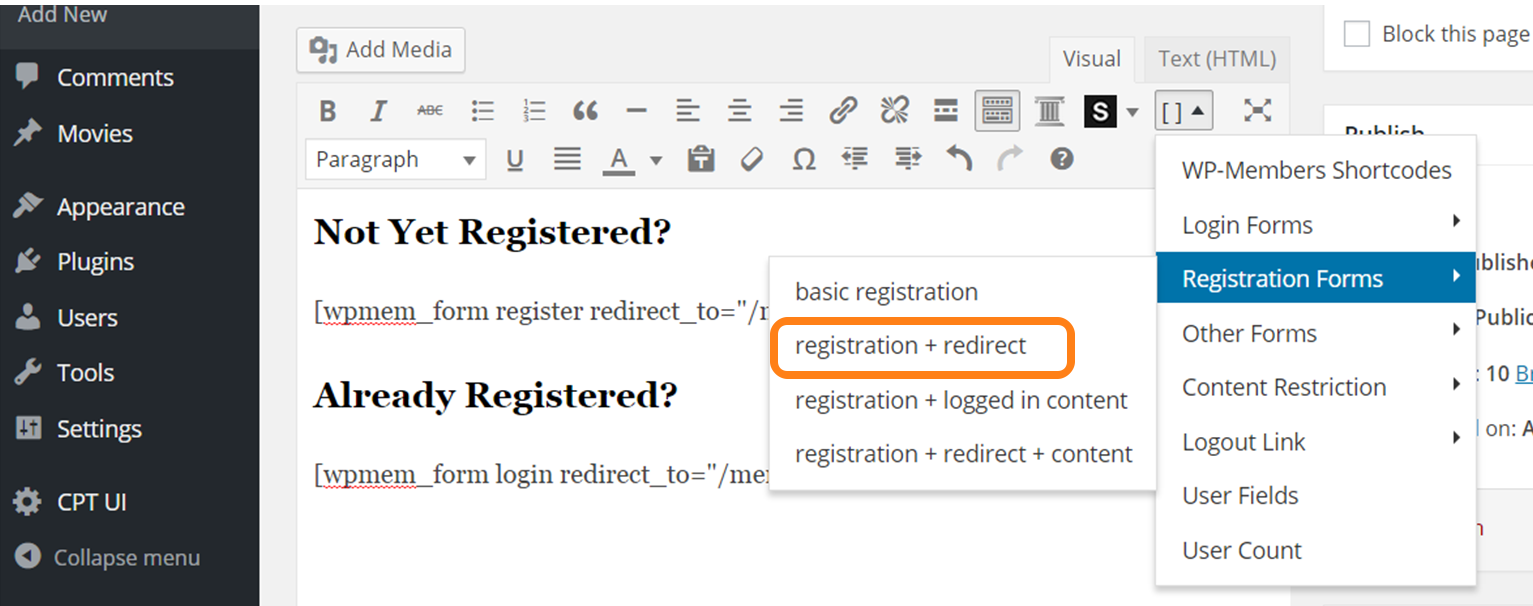
Once you’ve set up your registration form fields, you can use the Editor to add a registration form to a page via WP-Members shortcodes. You can see this icon is now added to your Editor toolbar. Because I want to control the landing page for newly registered users, I’m selecting the shortcode for ‘registration + redirect’.
I’m also going to put a Login form on the same page, so I’ll insert shortcodes from Login Forms, also with a redirect. Here is my page so far with unedited shortcodes:
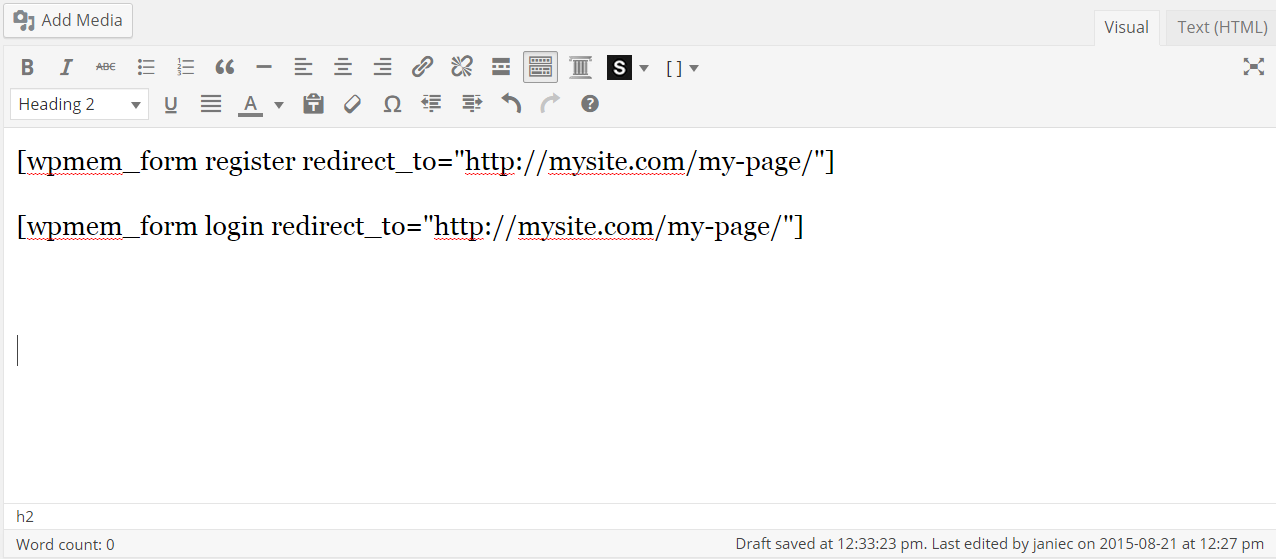
This is what WP-Members forms look like, with just those unedited shortcodes:
I’m going to edit the shortcodes to redirect to the Members Only page after the user registers and add some headings. I'll also arrange it all in two columns using shortcode from Easy Columns.
NOTE: If you want to learn how to use Easy Columns, here is the blog.

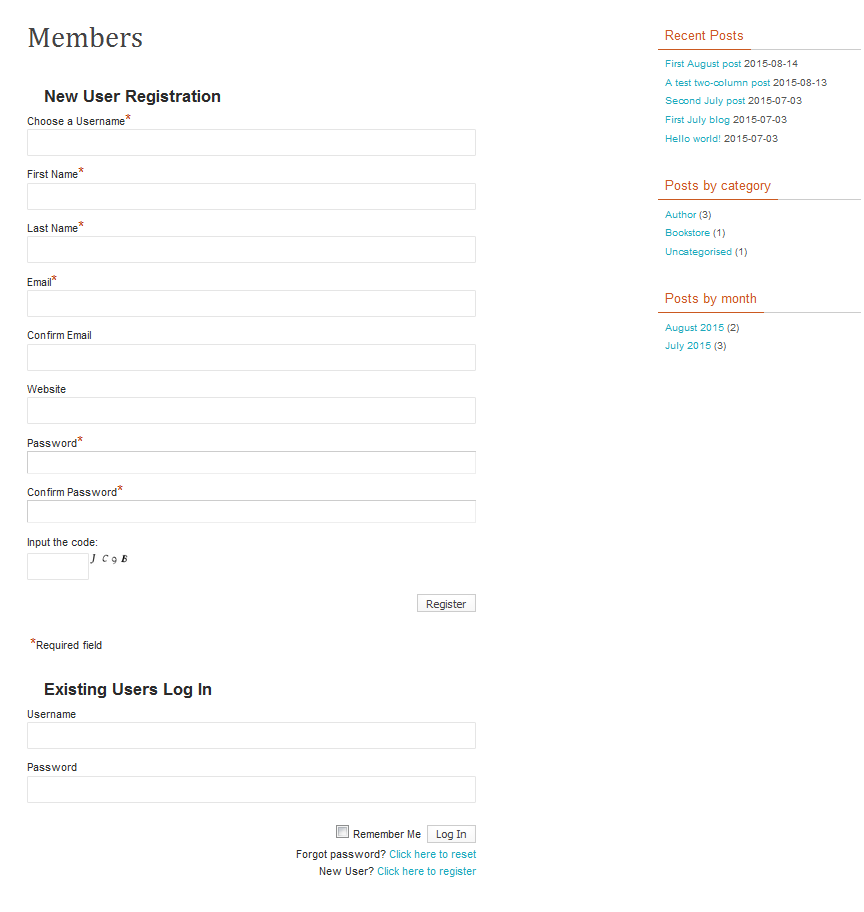
This is what the page looks like now:
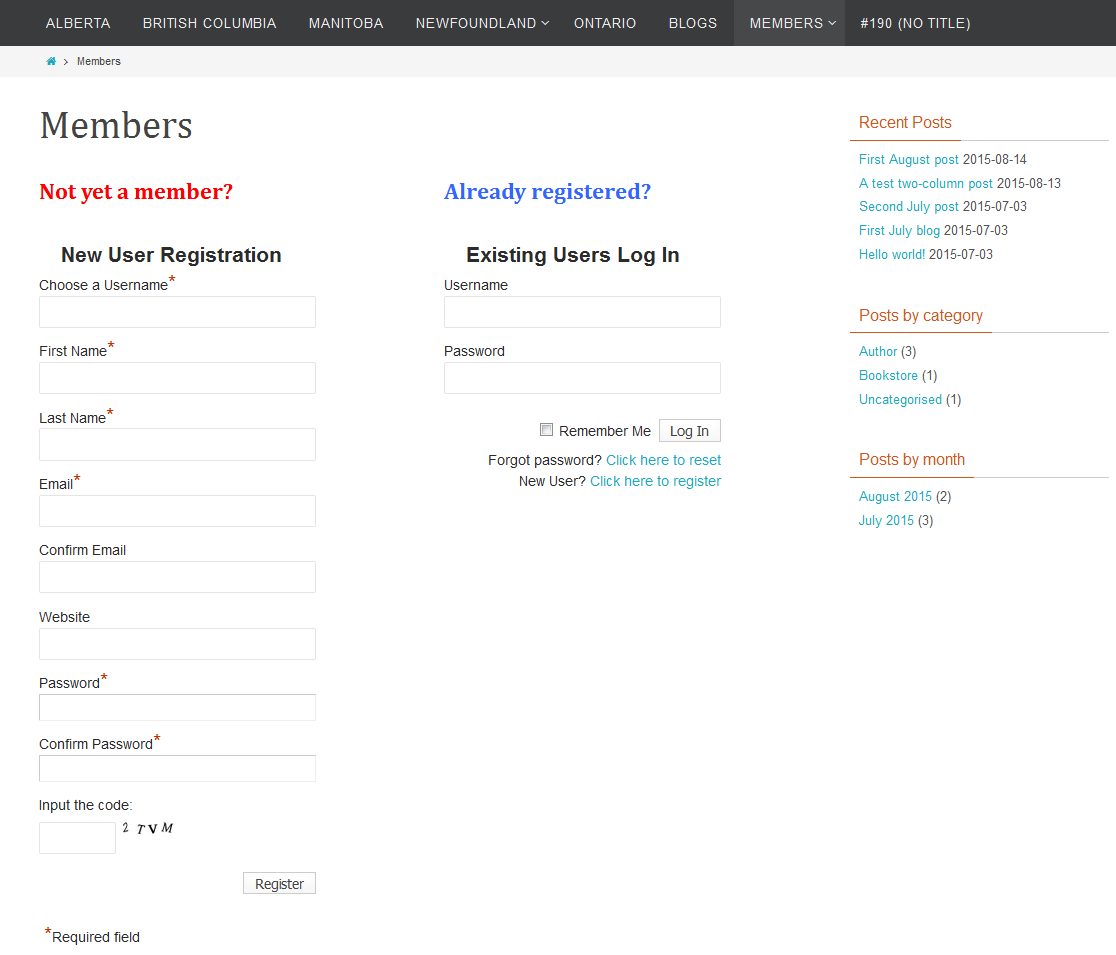
Hide menu items
I’ve created two sub-pages under Members: Members Only and Exclusive Content. They are restricted to logged in users only. However, because the page titles still show up on the main menu bar, anonymous users can navigate to those pages. They won’t see anything on those pages except a ‘you must be logged in’ message, but it would be cleaner if they didn’t see those menu items at all.
This is where Nav Menu Roles comes in. Go to WordPress Appearance > Menus. You’ll notice that there’s now a drop-down menu on each page which gives you the option of displaying the menu item by login status: Logged In, Logged Out, or Everyone. You can limit Logged In Users even further by role so that only the roles you select (Admin, Editor, Author, Contributor, Subscriber) can see the menu link. Leaving roles unselected defaults to anyone who is logged in.
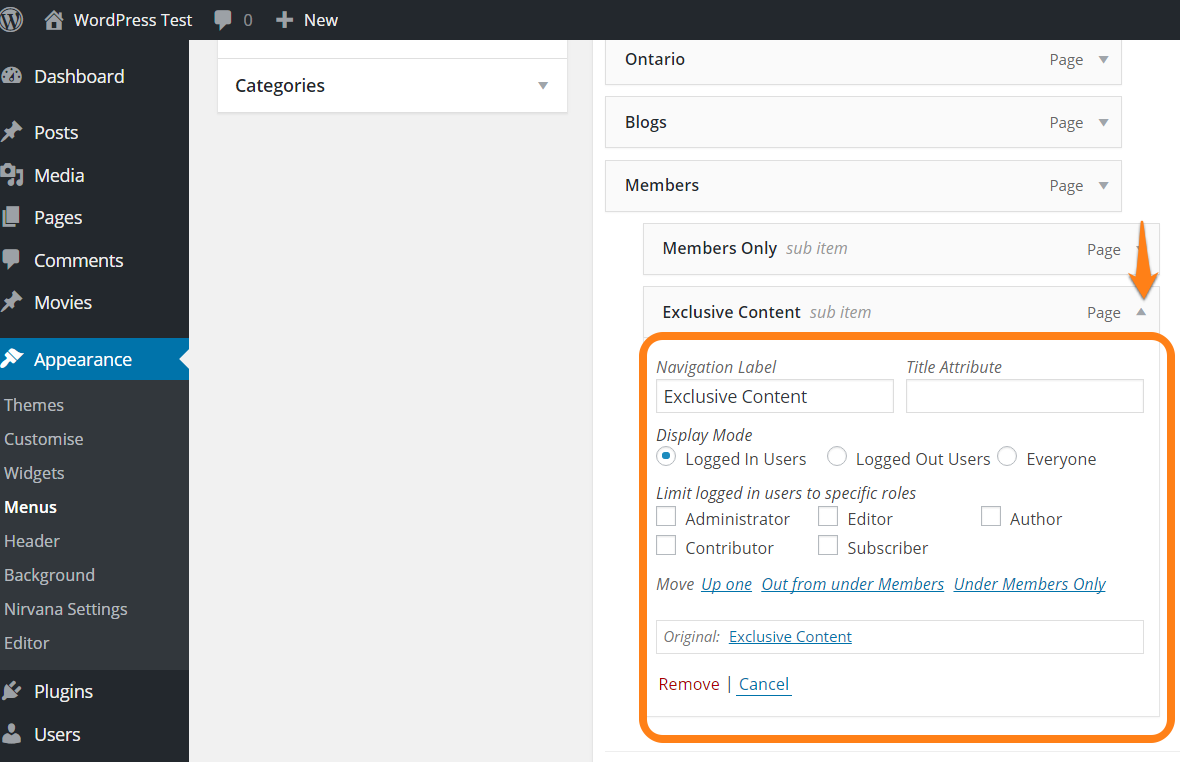
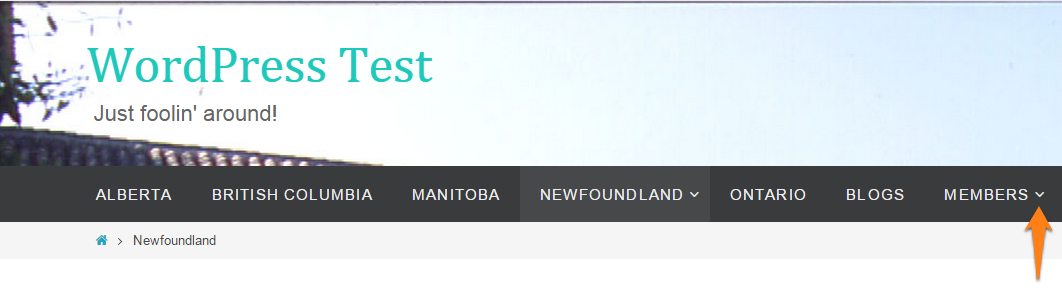
Once I set Members Only and Exclusive Content to ‘Logged In Users’, logged out users can only see the Members menu item and there’s no hint of sub-pages.
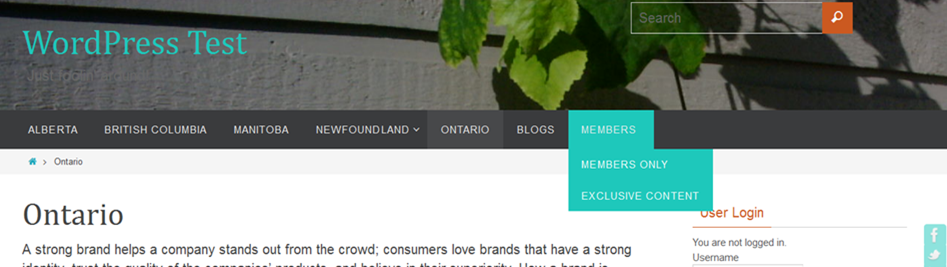
Logged in users can see indication of sub-pages and will get the drop-down menu if they mouse over the menu item.
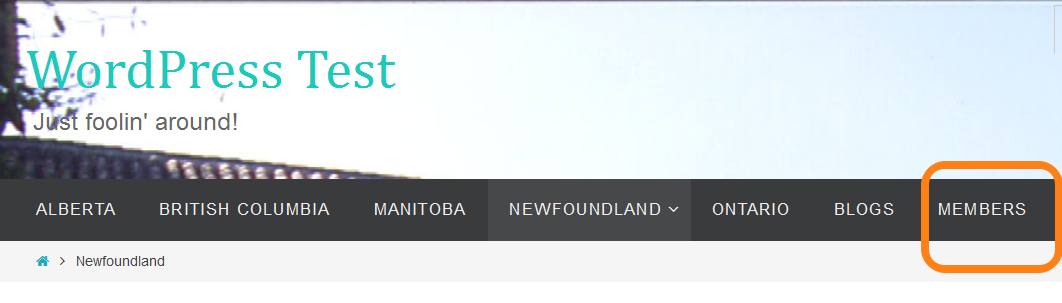
Logged out users can’t.
Add login/logout to the sidebar
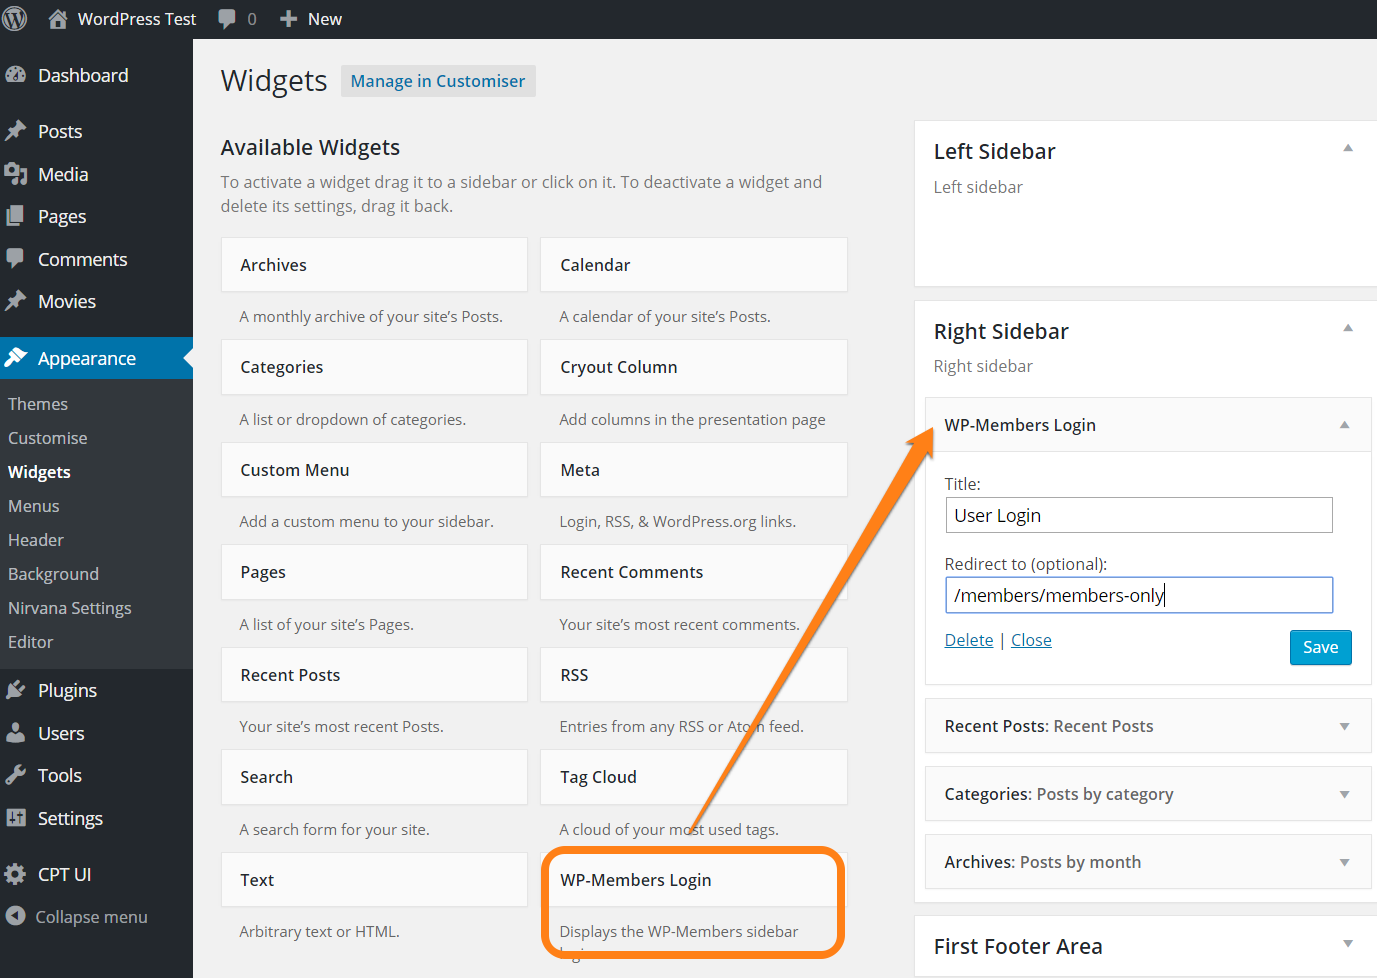
I want to let users log in and log out conveniently from any page, not just the Members page; WP-Members has a sidebar widget for that. From Appearance > Widgets, drag the WP-Members Login widget to a sidebar.
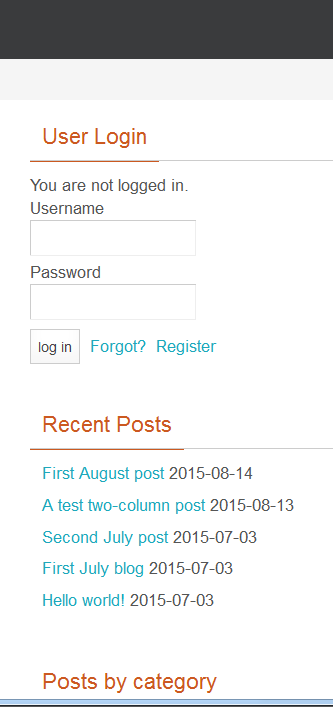
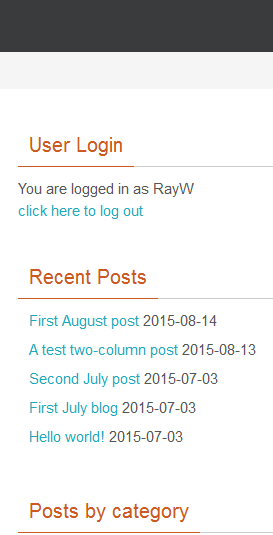
This adds a mini User Login/Logout form to the sidebar, depending on logged in status. Notice how it also incorporates links to Forgot? and Register thanks to our earlier settings for Register Page and User Profile Page.
Set WordPress logout to Home page
Now for one more small detail to do with logging out. There’s another place where users can log out: via WordPress.

By default the WordPress logout sends the user to this default WordPress page:
The WP-Members logout, however, takes users to the Home page. So just in case a user stumbles upon the WordPress logout, we want to present the same, friendlier experience of landing on the Home page upon logout. For this, all you need to do (if you didn’t already upon installation) is Activate the WPi Custom Logout plugin from Plugins > Installed Plugins. That’s all.
In conclusion
WP-Members is a no-frills, simple plugin. What it does, it does well. This plugin makes it easy for site editors to implement restricted pages based on logged in status and roles. Add Nav Menu Roles and WPi Custom Logout plugins to give your content restriction a more polished user experience. For many small businesses, these provide enough functionality to allow partners or special customers to see privileged information such as price lists, product support pages, or beta product information.
If you have more complicated requirements for restricting content or membership access, there are more than a hundred plugins in the WordPress world, each addressing different needs. I'll be exploring some of those in future blogs.
In our experience, when clients want membership management features for a website, they also need to optimize their website for driving visitors to a ‘register’ or ‘join’ call-to-action. Smartt’s Website Planning Roadmap process delves into your business goals and translates them into a project brief you can use for web development and design. Contact Smartt if you feel your website could be doing more for you.

