 Branding
 Digital Marketing
 IT Services
 Web & App Dev
Creating Drupal Forms that Work with MailChimp
Skill level for content editors: Intermediate
In an earlier blog, we wrote about integrating WordPress with MailChimp. A similar integration is available for Drupal. If you’re already using MailChimp and want to collect names via a form on Drupal, the MailChimp module lets you create signup forms, passes the data on to your MailChimp account, and displays the forms as blocks or pages. You can subscribe any entity with an email address to one or more MailChimp lists.
NOTE: This blog assumes you already have a MailChimp account and are somewhat familiar with using MailChimp. It also assumes you have a test site for playing around and will be using this test site.
What you will need
Using this integration is really very simple. The most complicated thing about this is making sure you install all the pieces. Download all of the following:
Libraries API module
The Libraries API is what allows third-party libraries to integrate with Drupal. Your Drupal installation may already have this installed. Just search Modules for ‘libraries’ and download from Libraries API if it’s not already there.
Entity API
The MailChimp module contains sub-modules. When you install MailChimp, the main module may not show a dependency on Entity API, but its sub-modules such as List and Sign Up will. If you don’t see it in in your collection of modules, you should download Entity API.
MailChimp module
We’re using Drupal 7, so I downloaded the latest production version of the MailChimp module for Drupal 7, which is the 3.6.

MailChimp API module
Why did I mention the version number above? If you read the MailChimp module documentation page you will notice some requirements for the 3.x version.
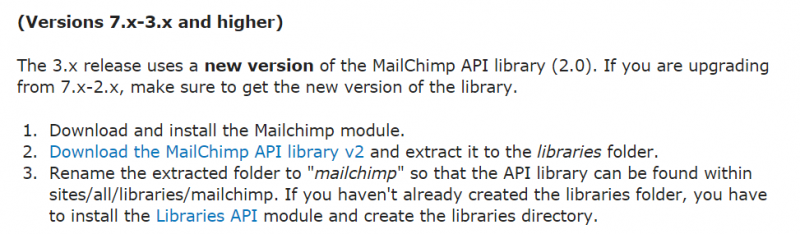
The MailChimp API library v2, also known as the MailChimp PHP API library, downloads as a zip file. Do this, and you should now have the following 2 – 4 downloaded files:

Installing modules and APIs
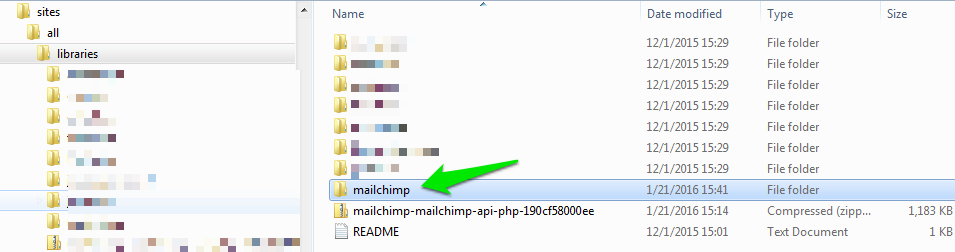
- Move the MailChimp API library compressed file into your Drupal file structure. This is the only tricky one. It should go into:
sites/all/libraries
If you’re not familiar with using FTP or Drupal file structures, get some help from an admin or webmaster. Extract the files from the zip file and then delete the zip file. Rename the extracted folder to ‘mailchimp’ and you’re done! Except for enabling the modules.
NOTE: if you want comprehensive documentation about where these files should live, try the README file in the MailChimp module folder (below).
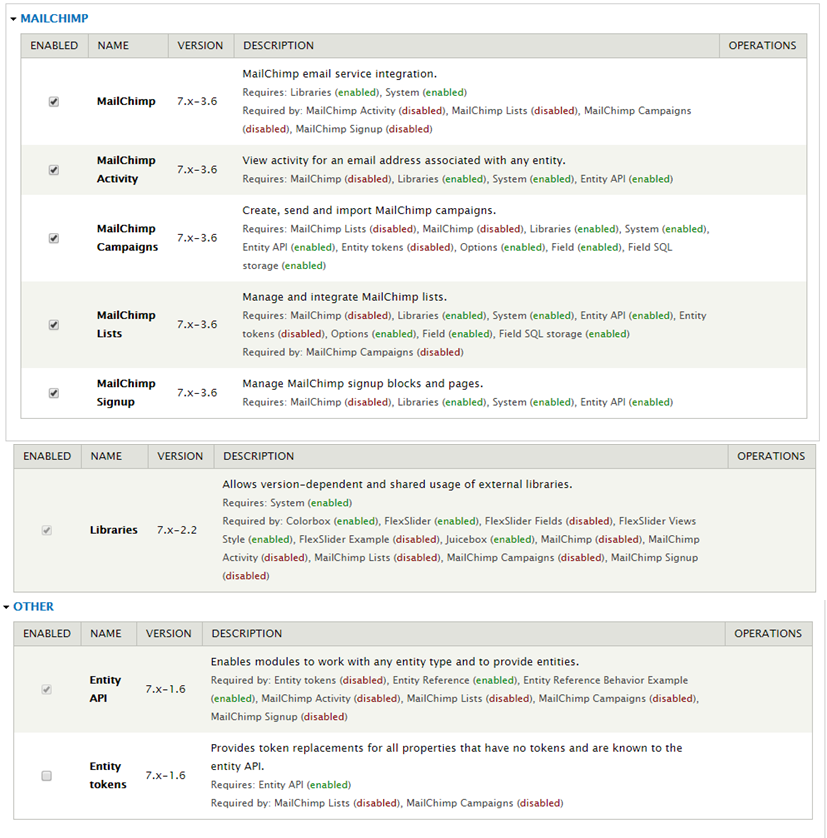
2. Install and enable the remaining modules the normal way, from the Modules page.
Enable all of the MailChimp modules and dependencies and then SAVE the configuration.
Connect Drupal to MailChimp
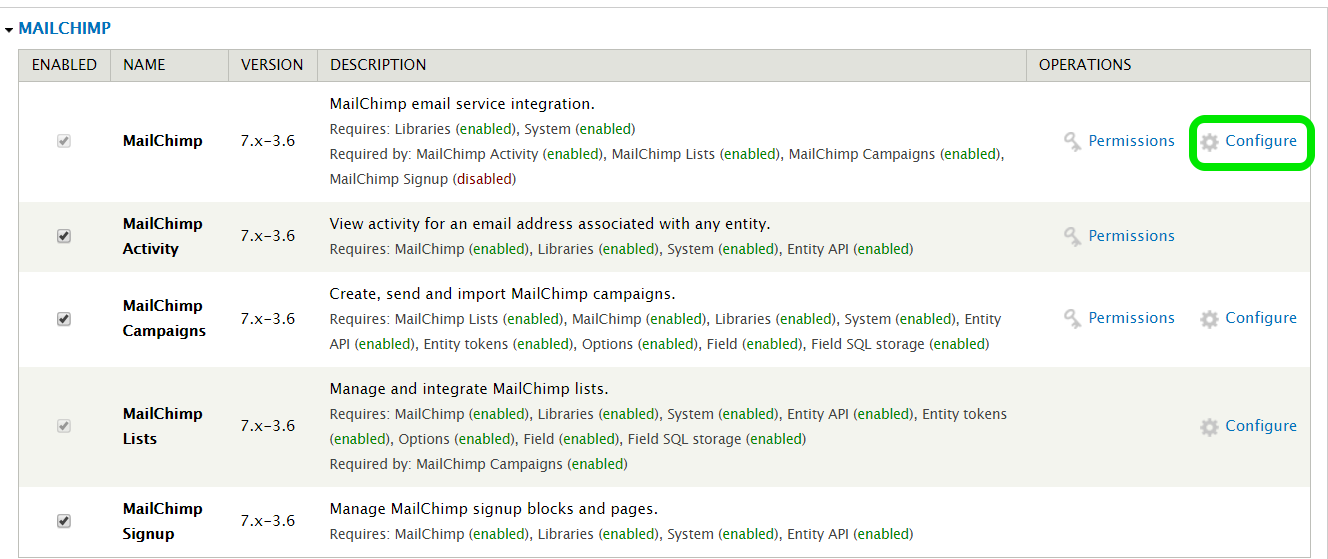
If everything has installed properly, you’ll be able to click on the Configure link beside MailChimp and connect Drupal to your MailChimp account.
The MailChimp API Key
The first bit of information it asks for is the MailChimp API key. This is how MailChimp identifies valid requests from Drupal.

MailChimp generates the key for you. To get your key:
- Log in to your MailChimp account
- Click on the Account tab on the upper right (beside the HELP link) and select Profile >> Extras. From Extras, select API keys.
- Click on Create a Key.
- Copy the API key and paste it into the module’s MailChimp API Key field and SAVE the configuration.
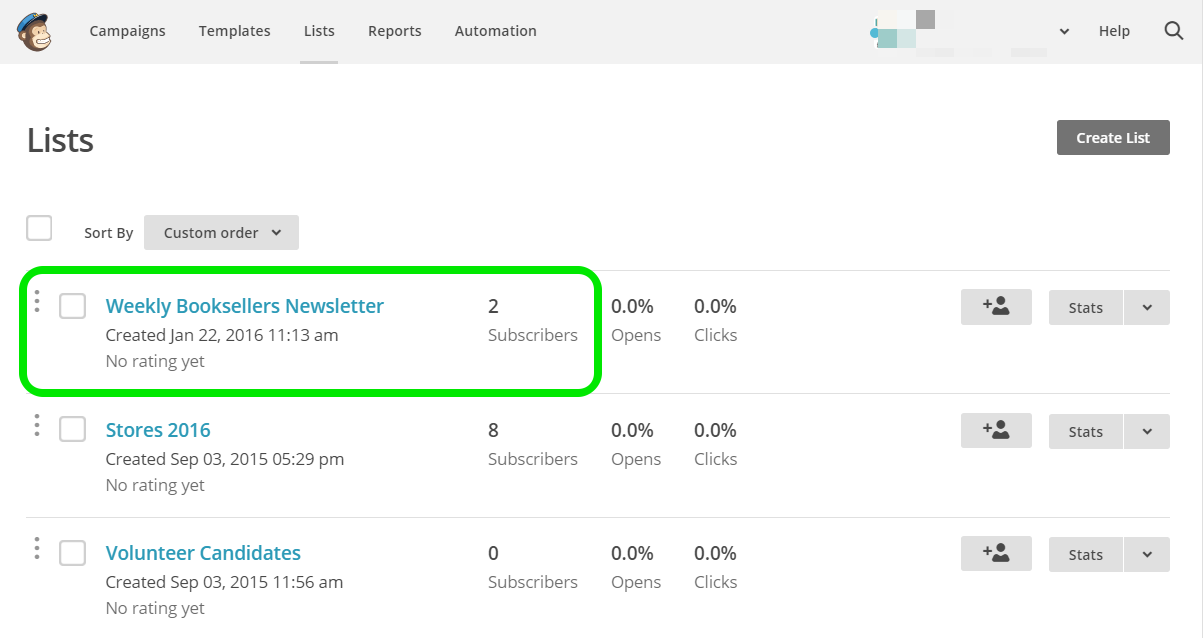
To check whether the connection has worked, just click on the LISTS tab. You should see a table with names of the lists which Drupal has fetched from your MailChimp account.
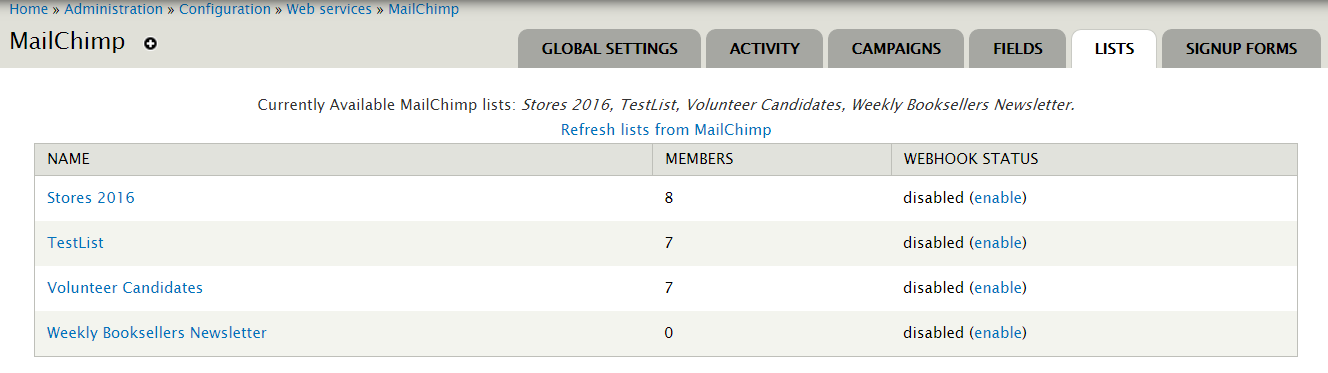
NOTE: whenever you add a new list in MailChimp and want to see on this page, click on ‘Refresh lists from MailChimp’.
Set Permissions for MailChimp Signup
Now that the two systems are connected, make sure that your permissions are set properly for using MailChimp.
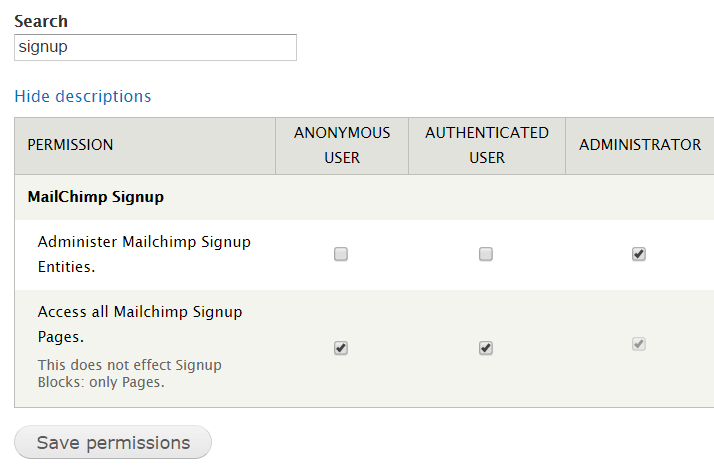
Go to Administration » People » Roles » Permissions. Find MailChimp Signup and allow authenticated and/or anonymous users to Access all MailChimp Signup Pages. This lets them fill out sign up forms. Anyone with Administer MailChimp Signup Entities can create new forms.
Create your first form
When you want to use or configure MailChimp, you will find it under Administration » Configuration » Web services. You’ll see a tab for Signup Forms.

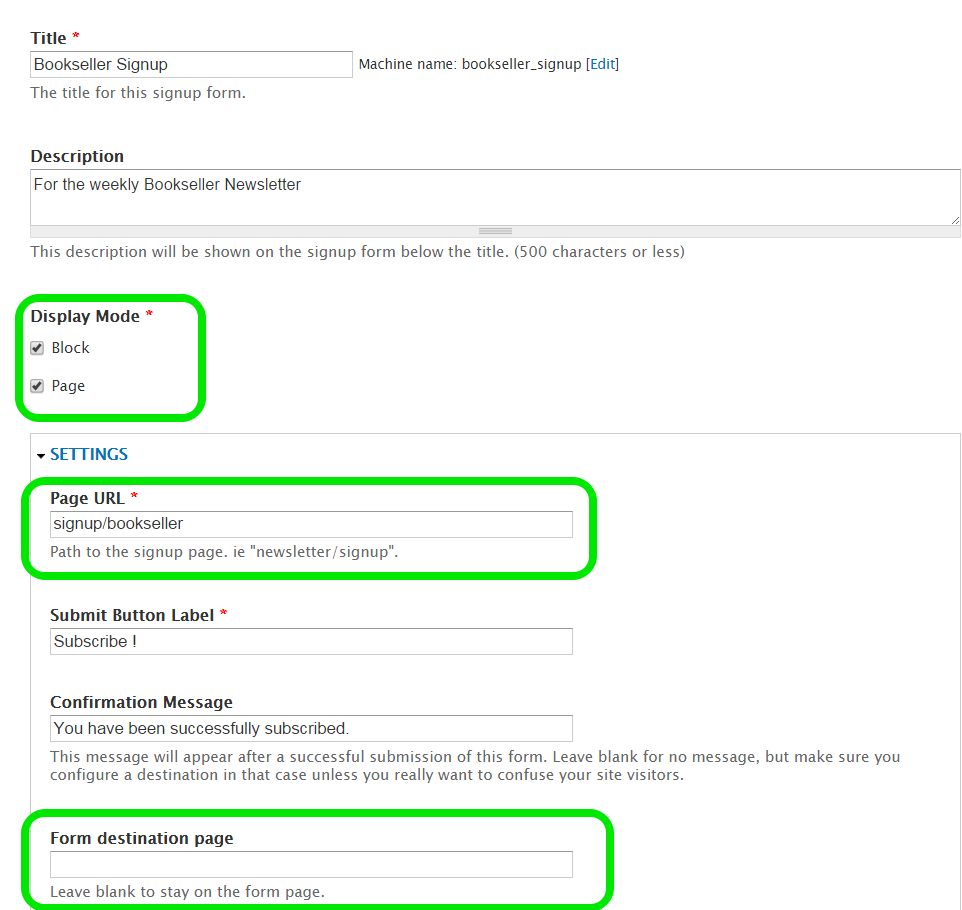
This brings you in to the Add Mailchimp Signup page. Here are some of the fields that require a bit of attention:
Display Mode: the module can create a form as a block, a page, or both. Click both for now just to see what happens.
Settings: when you click on Page, Settings asks you for a Page URL. I already have a signup page for other things, so I’ll just locate the Stores Newsletter page under that one.
Form destination page: if you have a landing page to use once people submit this form, enter it here. Or come back and enter it here when you have one.
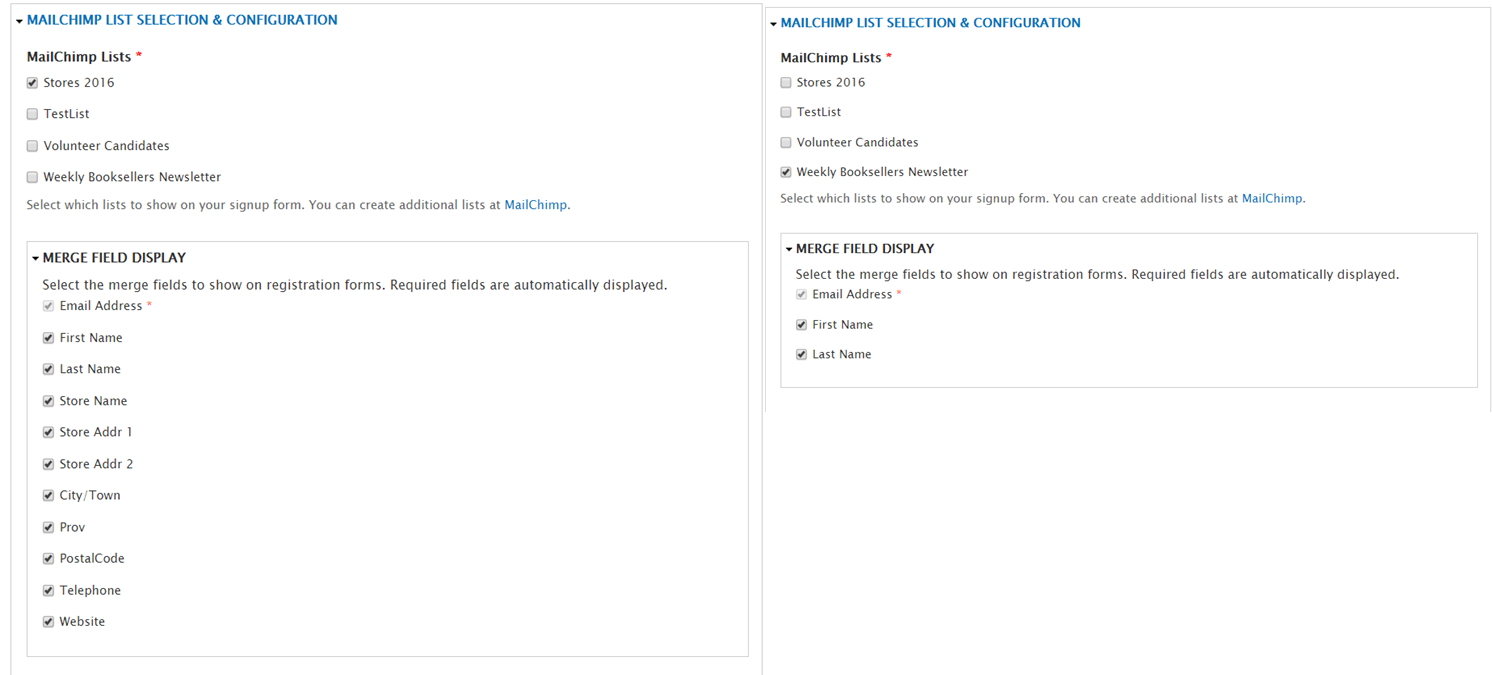
Mailchimp list selection & configuration: select the name of the MailChimp list you want users of this form to subscribe to.
An existing list: you’ll notice that when you select a list that’s already in use, the fields for that list show in the Merge Field Display. If you select a new list where you haven’t yet set up any fields, MailChimp returns the required field (an email address) and recommended fields (First Name, Last Name).
Subscription Settings: if your company is based in Canada, you should comply with CASL rules for anti-spam and select Require subscribers to Double Opt-in.
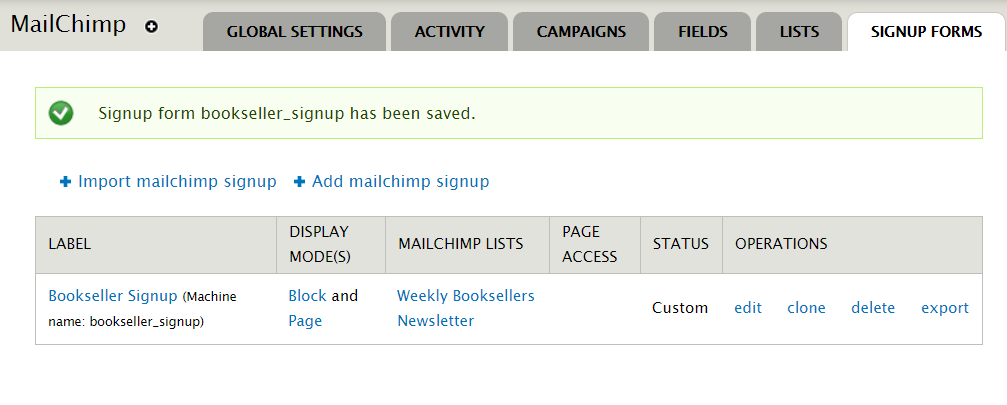
SAVE and here is the new sign up form!
Try Out the Form
This module has created both a Page and a Block.
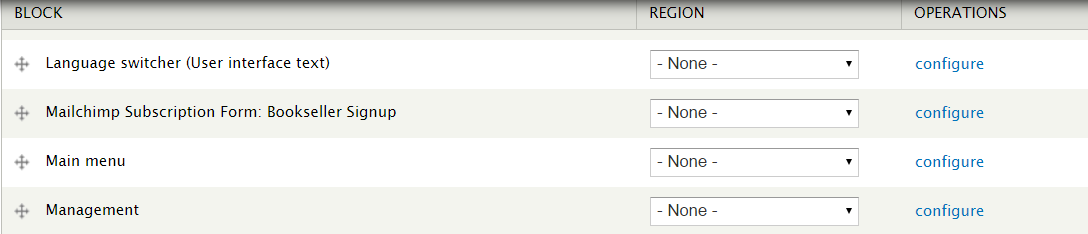
Check out the Block: Under the Display Mode(s) heading, click on Block, and look for the new block, which will be labeled ‘Mailchimp Subscription Form: YourFormName’. It’s just another block which you can place like any other block.
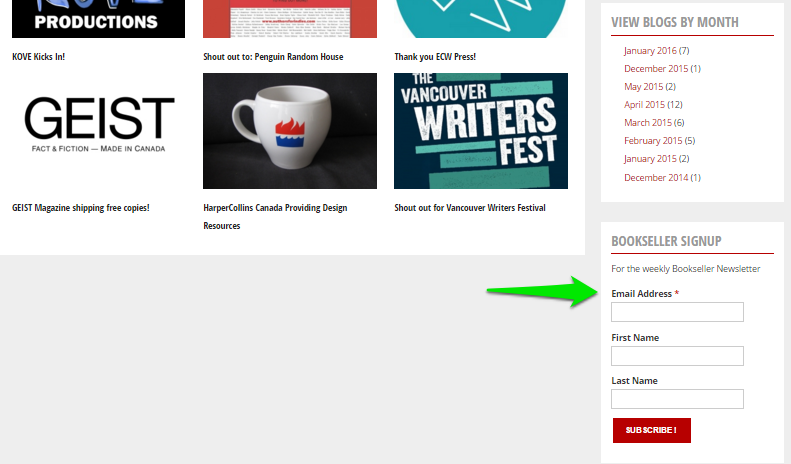
If I place the block on Sidebar 2, here is how it appears as the last block in the sidebar:
Check out the Page: Go back and click on the link Page. Here is what I get on the /signup/bookseller page:
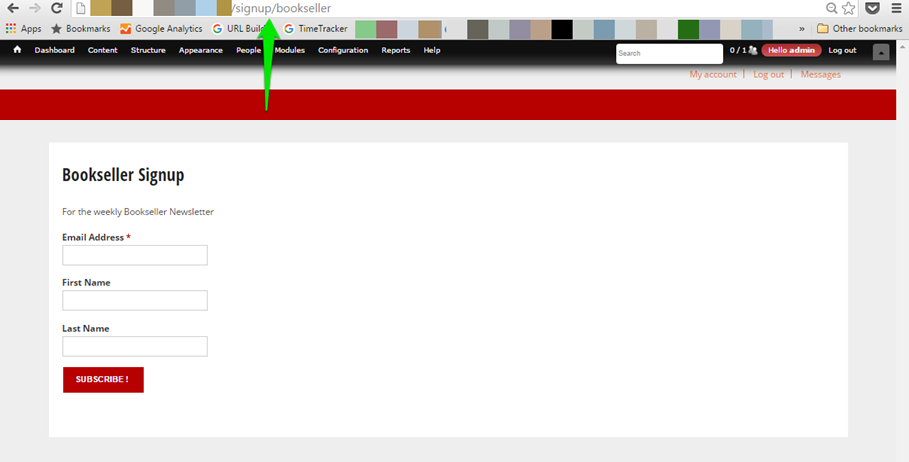
Enter a couple of names and email addresses to try things out!
Check out MailChimp: go into MailChimp to see the results. It may take a few minutes before MailChimp updates its lists with your new subscriptions.
Now you can collect names and contact information through a form on Drupal, have the data pass through to MailChimp, and carry on building campaigns on MailChimp as usual!
But wait, there’s more!
You may have a number of different newsletters, announcements, or events you want users to subscribe to. Rather than create a form for each one, it’s easy to put more than one choice of list on a form. Let’s say I want to add a form to sign up interested Volunteers.
All that’s required is to select the Volunteer Candidates list from the MailChimp List Selection & Configuration setting.
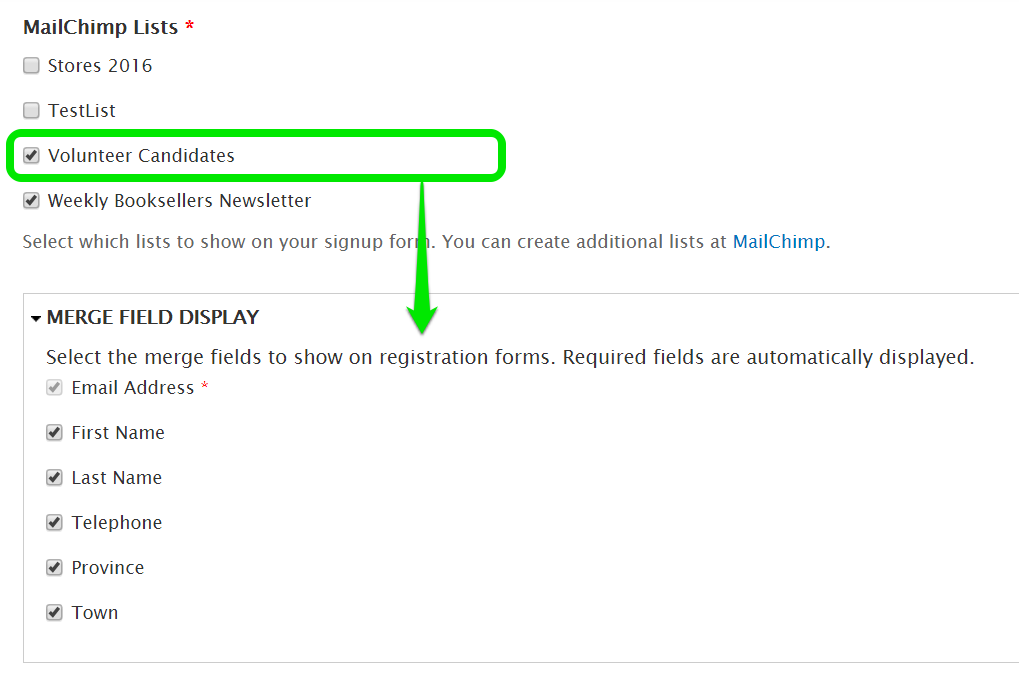
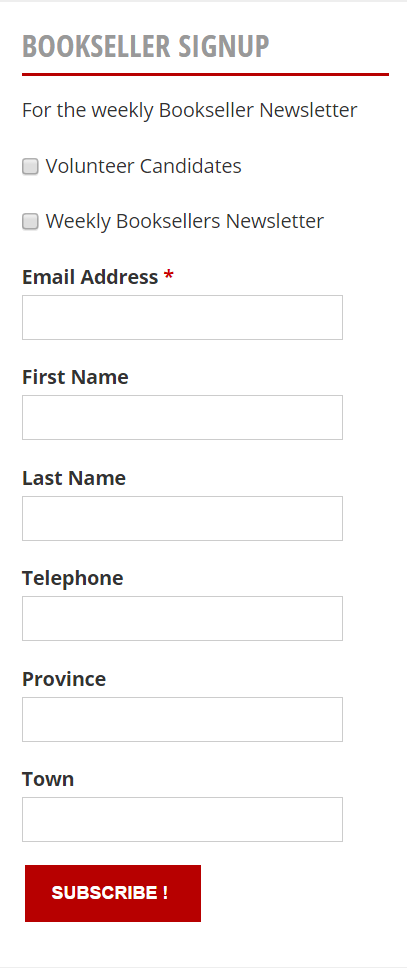
Your Signup form now contains selection boxes for each list.
If you feel your website could use a refresh and wonder whether Drupal is the right content management platform for you, contact us about our Web development services.

